
Decadent Red Velvet Brownie Pie Recipe for Chocolate Lovers
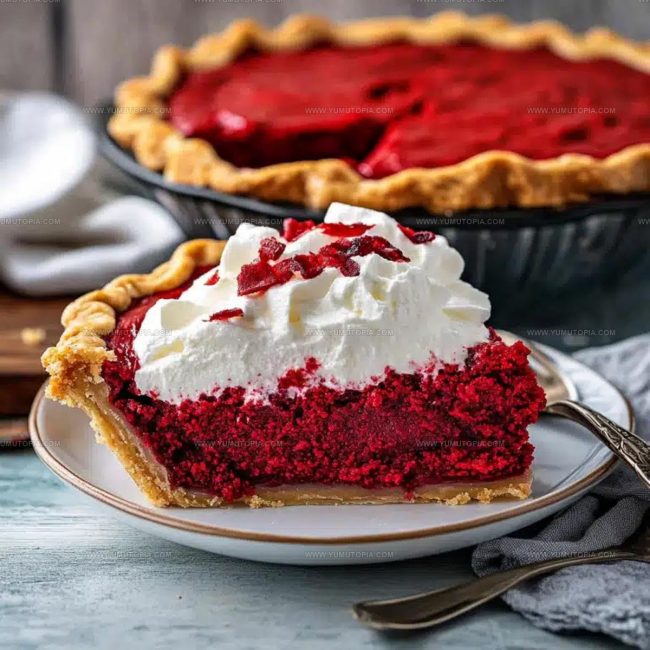
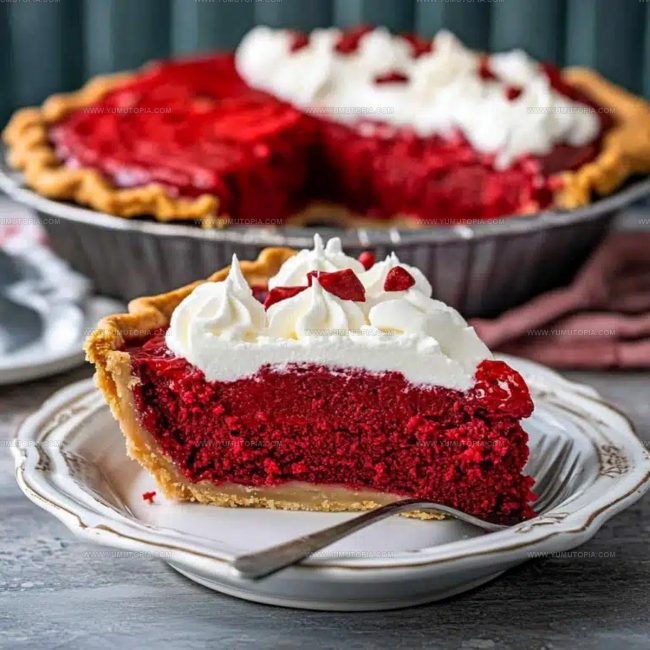
Rich Red Velvet Brownie Pie Recipe feeds the soul with its stunning appearance and decadent flavor that makes any occasion feel special.
The combination of fudgy texture with a distinctive taste creates something truly memorable for dessert lovers everywhere.
Whether celebrating holidays or simply treating loved ones to something extraordinary, this dessert never fails to impress at gatherings.
The deep crimson color alone sparks conversation and adds drama to the table before anyone even takes a bite.
Baking enthusiasts appreciate how it merges two beloved classics into one showstopping creation.
Serving slices of this indulgent treat brings smiles and compliments from everyone who experiences it.
A Stunning Double-Layer Decadence Found in Red Velvet Brownie Pie
Red Velvet Brownie Pie Batter And Crust Ingredient Guide
Pie Bakeware And Mixing Equipment For Red Velvet Brownie Pie
Ways to Bake a Decadent Red Velvet Brownie Pie
Prep the Oven
Crank up your oven to 350°F (175°C). Grab that 9-inch pie dish and get your pie crust ready to go.
Mix the Wet Ingredients
Grab a mixing bowl and pour in 12 cup (115 g) melted butter. Add 1 cup (200 g) granulated sugar and whisk until they’re looking smooth and glossy. Crack in 2 large eggs one at a time, stirring after each. Then add these extras:
Stir everything until the mixture looks completely blended.
Combine Dry Ingredients
Sift 3/4 cup (95 g) all-purpose flour and 1/4 teaspoon salt into your wet mixture. Fold gently until just combined – don’t go crazy with the mixing.
Fill the Pie Crust
Pour that beautiful red batter into your prepared pie crust. Use a spatula to spread it evenly across the surface.
Bake to Perfection
Slide the pie into the 350°F (175°C) oven and bake for 30-35 minutes. You’re looking for that sweet spot where it’s set but still has a slight fudgy wiggle. Test with a toothpick – it should come out with a few moist crumbs.
Cool Down
Let the pie rest for at least 1 hour. This helps it set up and makes slicing way easier.
Dress It Up
Finish your masterpiece by either spreading cream cheese frosting on top or dusting with powdered sugar. Serve with a dollop of whipped cream or a scoop of vanilla ice cream on the side.
The Core: Behind the Decadent Density of Red Velvet Brownie Pie
Cream or Ice Cream Adaptations for Red Velvet Brownie Pie
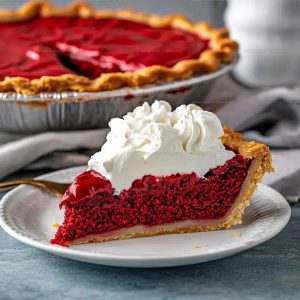
Decadent Pie Presentations For Red Velvet Brownies
Decadent Dessert Slicing & Saving Styles For Brownie Pie
Red Velvet Brownie Pie FAQs and Baking Tips
What gives red velvet its signature color?
The deep red comes from combining cocoa powder with red food coloring, creating that classic rich burgundy shade that makes this dessert so stunning.
Can I make this without food coloring?
Absolutely – you can skip the food coloring and still have delicious chocolate brownie pie. The taste remains the same, just with a more traditional chocolate appearance.
How do I know when the brownie pie is perfectly baked?
Check for a set center that still looks slightly fudgy. When you insert a toothpick, it should have a few moist crumbs attached – this means your pie is perfectly done.
What type of cocoa powder works best for this recipe?
Dutch-processed cocoa powder delivers the richest chocolate flavor and creates a smoother texture in your brownie pie.
Is red velvet just chocolate with food coloring?
Not exactly. Red velvet has a subtle tang from vinegar and buttermilk that gives it a distinctive flavor different from standard chocolate desserts.
Can I freeze this brownie pie?
Yes, wrap it tightly in plastic wrap and freeze for up to 3 months. Thaw overnight in the refrigerator before serving.
Rich Red Velvet Brownie Pie Recipe
- Total Time: 1 hour 45 minutes
- Yield: 8 1x
Description
Red Velvet Brownie Pie combines rich chocolate and classic Southern charm in one delightful dessert. Smooth chocolate brownie filling nestles into a tender crust, creating a deep crimson treat perfect for sharing with friends and family.
Ingredients
Pie Base:
- 1 unbaked 9-inch pie crust
Main Ingredients:
- 2 large eggs
- 1 cup (200 g) granulated sugar
- ¾ cup (95 g) all-purpose flour
Supporting Ingredients:
- ½ cup (115 g) unsalted butter, melted
- 1 tablespoon unsweetened cocoa powder
- 1 tablespoon red food coloring (liquid or gel)
- 1 teaspoon vanilla extract
- 1 teaspoon white vinegar
- ¼ teaspoon salt
Garnish:
- Cream cheese frosting
- Powdered sugar
- Whipped cream or vanilla ice cream
Instructions
- Preheat your oven to 350°F (175°C). Position a 9-inch pie crust in your pie dish, ensuring it’s evenly settled.
- Melt ½ cup (115 g) unsalted butter in a large mixing bowl. Whisk in 1 cup (200 g) granulated sugar until the mixture looks glossy and smooth.
- Crack 2 large eggs into the butter-sugar mixture, incorporating them one at a time. Stir in 1 teaspoon vanilla extract, 1 tablespoon unsweetened cocoa powder, 1 tablespoon red food coloring, and 1 teaspoon white vinegar.
- Sift ¾ cup (95 g) all-purpose flour and ¼ teaspoon salt into the wet ingredients. Fold gently until just combined, avoiding overmixing.
- Transfer the batter into your prepared pie crust, spreading it evenly with a spatula to create a smooth surface.
- Slide the pie into the preheated oven and bake for 30-35 minutes. The center should look set but still slightly soft when gently touched.
- Remove from the oven and let the pie cool completely for at least 1 hour, allowing it to firm up.
- Decorate by dusting with powdered sugar or spreading cream cheese frosting. Serve with a dollop of whipped cream or a scoop of vanilla ice cream.
Notes
- Room temperature ingredients ensure smooth, even mixing and help create a consistent texture in your brownie pie.
- Check the pie early to prevent overbaking, which can dry out the rich, fudgy center and make the dessert tough.
- Gluten-free flour works perfectly as a direct swap if someone needs a wheat-free version of this decadent treat.
- Cool the pie completely before cutting to help the structure set and prevent crumbling, giving clean, beautiful slices.
- Prep Time: 15 minutes
- Cook Time: 30-35 minutes
- Category: Pies
- Method: Baking
- Cuisine: American
Nutrition
- Serving Size: 8
- Calories: 301 kcal
- Sugar: 21 g
- Sodium: 132 mg
- Fat: 20 g
- Saturated Fat: 11 g
- Unsaturated Fat: 8 g
- Trans Fat: 0.5 g
- Carbohydrates: 26 g
- Fiber: 1 g
- Protein: 4 g
- Cholesterol: 64 mg
Logan Lemaster
Founder & Culinary Innovator
Expertise
Recipe Development and Innovation, Menu Design and Optimization, Fine Dining Techniques, Ingredient Pairing and Flavor Science
Education
Metropolitan Culinary Arts Institute
Logan’s culinary journey kicked off in his vibrant Chicago family kitchen, where fresh, seasonal ingredients and bold flavors were always front and center.
After graduating from the Metropolitan Culinary Arts Institute in Arlington, Virginia, and honing his skills in renowned restaurants, Logan mastered the art of blending classic techniques with exciting, modern twists.
His kitchen is a dynamic lab for flavor exploration. Through Yum Utopia, Logan aims to empower you to cook with both confidence and creativity, turning simple ingredients into spectacular meals.