
Recipe for Decadent Red Velvet Brownies with Cream Cheese
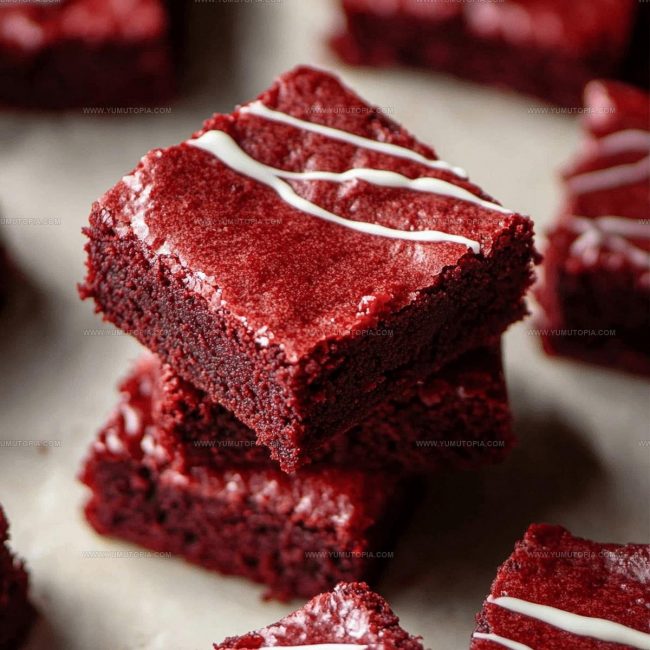
Red velvet brownies combine two beloved desserts into one unforgettable treat that feels both familiar and excitingly new.
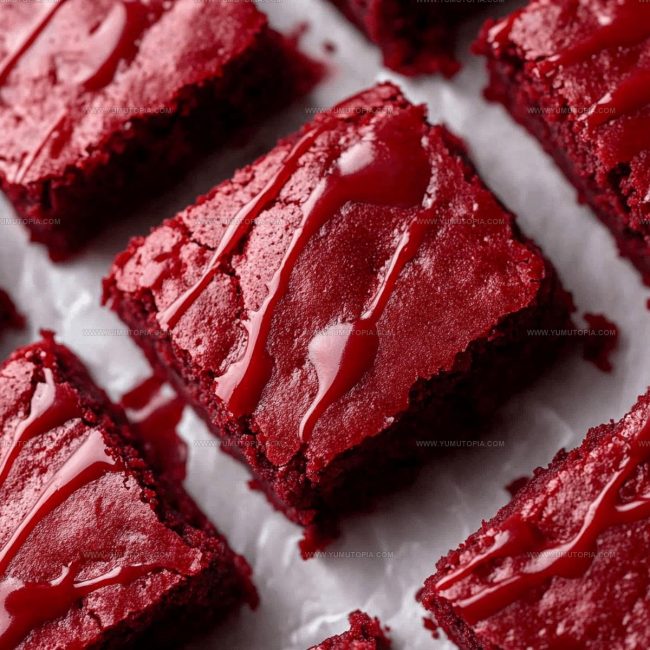
The deep crimson color makes them instantly recognizable at any gathering, whether you’re hosting a casual weekend get-together or celebrating something special.
Soft, fudgy texture meets a subtle cocoa flavor that’s never overwhelming, creating a balance that appeals to chocolate lovers and those who prefer milder sweets alike.
You can serve them plain for pure simplicity or dress them up depending on the occasion.
They’re surprisingly easy to make despite looking impressive on any dessert table.
Baking a batch fills your kitchen with an aroma that has everyone asking when they’ll be done, so have plates ready because these disappear fast.
What Makes Red Velvet Brownies So Rich
Red Velvet Brownie Ingredient Overview
Main Ingredients:Flavor Enhancers:Cream Cheese Swirl (Optional):Supporting Ingredients:Essential Tools for Red Velvet Brownies
Red Velvet Brownies Fudgy Baking Guide
Prepare Baking Dish
Preheat the oven to 350°F. Grab your 9×13 inch baking dish and line it with parchment paper, making sure to leave some extra hanging over the sides so you can easily lift out the brownies later.
Create Brownie Base
Grab a large mixing bowl and melt 2 sticks of unsalted butter. Whisk in 1 ½ cups granulated sugar and 1 cup packed light brown sugar until they’re completely combined. Crack in 4 large eggs, then add 2 teaspoons vanilla extract and 2 tablespoons red food coloring. Stir everything together smoothly. Sprinkle in these ingredients:
Mix until the batter just comes together – don’t overmix.
Prepare Cream Cheese Swirl
In a separate bowl, beat 8 ounces of softened cream cheese with ¼ cup granulated sugar. Add 1 egg yolk and ½ teaspoon vanilla extract. Blend until the mixture looks silky and smooth.
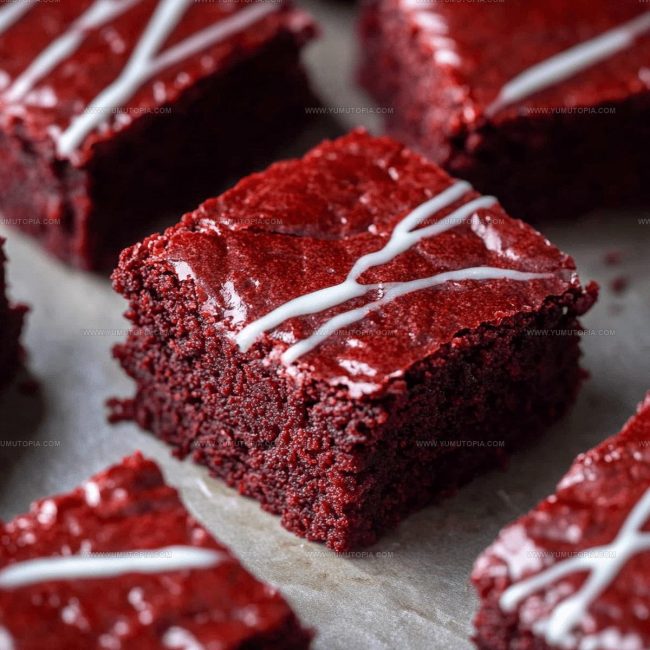
Layer and Swirl
Pour the red brownie batter into your prepared pan. Drop spoonfuls of the cream cheese mixture across the top. Take a knife and gently drag it through the layers to create a beautiful marbled effect.
Bake to Perfection
Slide the pan into the 350°F oven and bake for 35-40 minutes. The brownies are done when a toothpick comes out with just a few moist crumbs – no wet batter!
Cool and Slice
Let the brownies cool completely in the pan. Once they’re at room temperature, lift them out using the parchment paper edges. Grab a sharp knife and cut into squares, wiping the blade clean between each cut for neat edges.
Helpful Notes for Red Velvet Brownies
Red Velvet Brownies with Creamy Swirl Options
Best Ways to Serve Red Velvet Brownies
Red Velvet Brownie Storage That Holds Moisture
Red Velvet Brownies Reader FAQ
What makes red velvet brownies different from regular brownies?
Red velvet brownies have a distinctive deep red color from food coloring and a subtle tangy flavor from vinegar, which gives them a unique taste and appearance compared to traditional chocolate brownies.
Can I make these brownies without cream cheese swirl?
Absolutely! The cream cheese swirl is optional. You can skip it and simply bake the red velvet brownie base, which will still taste delicious and rich.
Do I need special equipment to make these brownies?
No special equipment is needed. You just need basic baking tools like a mixing bowl, whisk, baking pan, and parchment paper to create these brownies.
How do I know when the brownies are perfectly baked?
Check the brownies with a toothpick – it should come out with moist crumbs, not wet batter. The edges will look set, and the center will be slightly soft when gently touched.
Can I use natural cocoa powder instead of Dutch-processed?
Natural cocoa powder works fine in this recipe. Just ensure your baking soda or powder matches the type of cocoa to maintain the right chemical reaction.
Rich Red Velvet Brownies Recipe
- Total Time: 50-55 minutes
- Yield: 12 1x
Description
Crafting Red Velvet Brownies brings pure joy to your baking adventure, delivering a rich chocolate experience with a gorgeous crimson twist. These brownies blend classic comfort with elegant Southern charm, creating a delectable treat perfect for your dessert table.
Ingredients
Primary Ingredients:
- 1 ½ cups all-purpose flour
- 1 cup 2 sticks unsalted butter
- 4 large eggs
- 1 ½ cups granulated sugar
- 1 cup light brown sugar
Secondary Ingredients:
- ¼ cup unsweetened cocoa powder
- 2 tablespoons red food coloring
- 2 teaspoons vanilla extract
- 1 teaspoon white vinegar
- ½ teaspoon salt
Cream Cheese Swirl:
- 8 ounces cream cheese
- ¼ cup granulated sugar
- 1 egg yolk
- ½ teaspoon vanilla extract
Instructions
- Preheat the oven to 350°F and prepare your 9×13-inch baking dish. Line the pan with parchment paper, creating generous overhangs so you can easily lift out the brownies later.
- Melt 2 sticks (1 cup) of unsalted butter in a large mixing bowl. Whisk in 1 ½ cups granulated sugar and 1 cup packed light brown sugar until thoroughly combined.
- Add 4 large eggs to the butter-sugar mixture. Incorporate 2 teaspoons vanilla extract and 2 tablespoons red food coloring, stirring until the batter looks vibrant and smooth.
- Sift ¼ cup unsweetened cocoa powder into the wet ingredients. Stir in 1 teaspoon white vinegar, 1 ½ cups all-purpose flour, and ½ teaspoon salt. Mix until just combined, avoiding overmixing.
- In a separate bowl, beat 8 ounces softened cream cheese with ¼ cup granulated sugar. Add 1 egg yolk and ½ teaspoon vanilla extract, mixing until the cream cheese swirl is completely smooth.
- Transfer the red velvet brownie batter to the prepared pan, spreading it evenly. Drop spoonfuls of cream cheese mixture across the surface.
- Use a knife to create gentle swirls throughout the batter, ensuring a marbled effect without overmixing.
- Bake at 350°F for 35-40 minutes. Check doneness by inserting a toothpick – it should come out with a few moist crumbs but no wet batter.
- Remove from the oven and let the brownies cool completely in the pan. Use the parchment paper to lift the entire batch onto a cutting surface.
- Slice into squares using a clean knife, wiping the blade between cuts for neat edges.
Notes
- Cream cheese swirl adds a tangy richness that balances the sweet chocolate flavor, so don’t skip this step if possible.
- For a deeper red color, use gel food coloring instead of liquid, which provides more intense pigmentation without thinning the batter.
- Ensure ingredients are at room temperature to help them blend smoothly and create a more consistent brownie texture.
- Let brownies cool completely before cutting to prevent crumbling and achieve clean, precise slices.
- Prep Time: 15 minutes
- Cook Time: 35-40 minutes
- Category: Brownies
- Method: Baking
- Cuisine: American
Nutrition
- Serving Size: 12
- Calories: 321 kcal
- Sugar: 29 g
- Sodium: 123 mg
- Fat: 20 g
- Saturated Fat: 11 g
- Unsaturated Fat: 8 g
- Trans Fat: 0.3 g
- Carbohydrates: 36 g
- Fiber: 1.5 g
- Protein: 4.5 g
- Cholesterol: 70 mg
Logan Lemaster
Founder & Culinary Innovator
Expertise
Recipe Development and Innovation, Menu Design and Optimization, Fine Dining Techniques, Ingredient Pairing and Flavor Science
Education
Metropolitan Culinary Arts Institute
Logan’s culinary journey kicked off in his vibrant Chicago family kitchen, where fresh, seasonal ingredients and bold flavors were always front and center.
After graduating from the Metropolitan Culinary Arts Institute in Arlington, Virginia, and honing his skills in renowned restaurants, Logan mastered the art of blending classic techniques with exciting, modern twists.
His kitchen is a dynamic lab for flavor exploration. Through Yum Utopia, Logan aims to empower you to cook with both confidence and creativity, turning simple ingredients into spectacular meals.