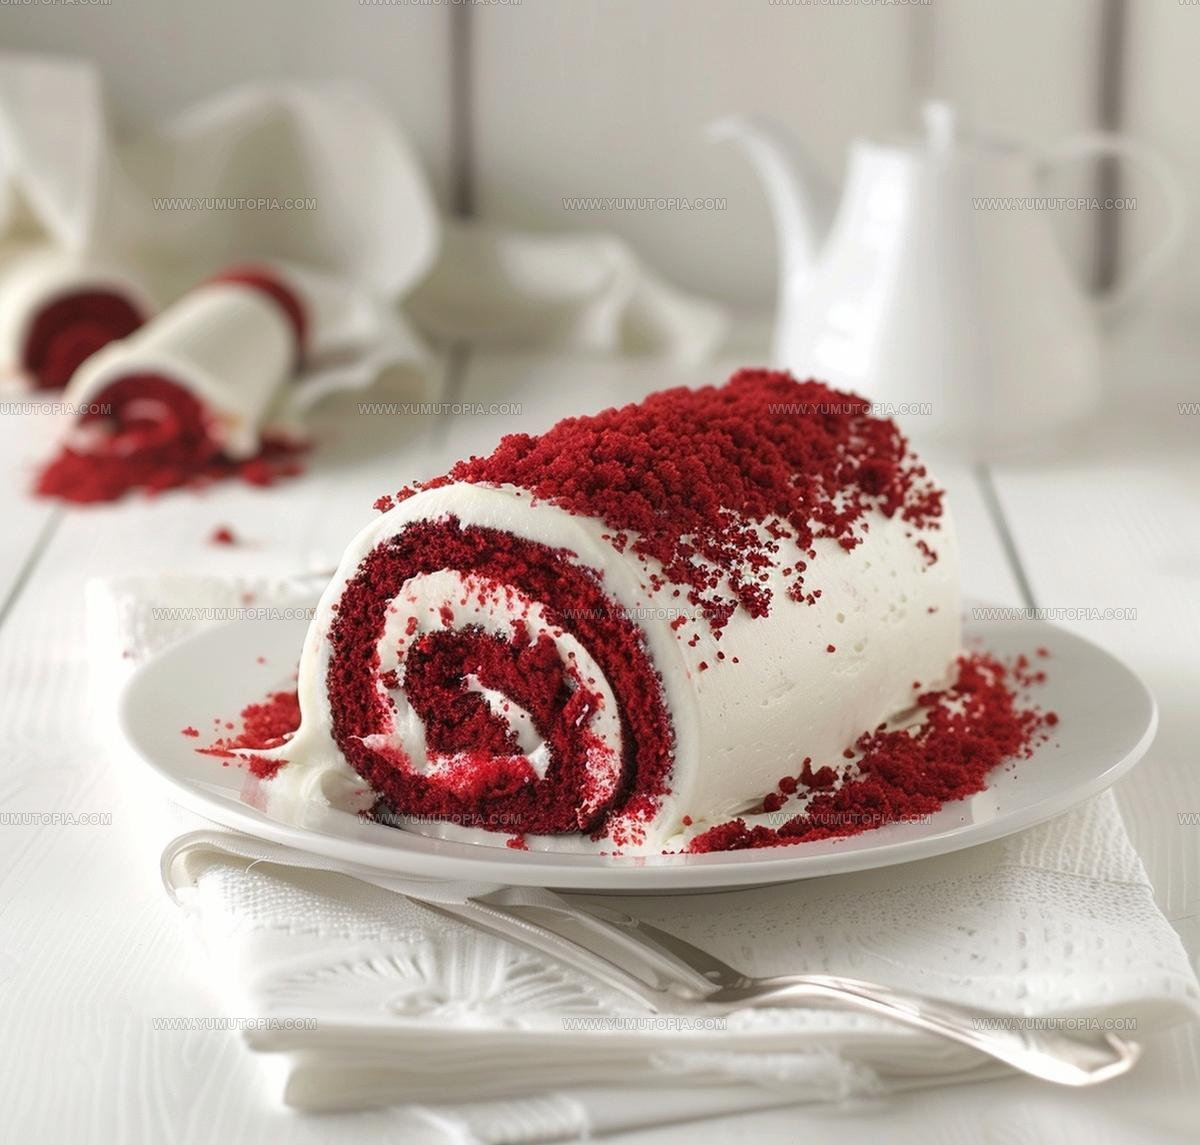
Smooth Rolled Red Velvet Cake Recipe
Rolled red velvet cake recipe options give home bakers a stunning dessert that looks as impressive as it tastes.
This showstopping treat combines soft, tender layers with creamy filling in every slice, making it perfect for celebrations or when you simply want something special.
The striking appearance creates an instant wow factor at any gathering, while the light texture keeps everyone coming back for another piece.
Best of all, the technique is more approachable than many people realize, requiring no special equipment or advanced skills.
Whether for birthdays, holidays, or weekend entertaining, this dessert offers both visual drama and satisfying flavors.
Now’s the moment to give yourself permission to tackle what looks fancy but comes together more easily than expected.
Reasons to Try a Rolled Red Velvet Cake
Ingredient Breakdown of Rolled Red Velvet Cake
Cake Ingredients:Wet Ingredients:Color Ingredient:Finishing Ingredient:Filling Ingredients:What Tools Help with Red Velvet Roll Cake
Rolled Red Velvet Cake Baking Guide
Prep the Oven and Pan
Crank up the oven to 350°F. Grab a jelly roll pan and line it completely with parchment paper, making sure to cover every inch so your cake won’t stick.
Mix Dry Ingredients
Grab a bowl and sift together these dry ingredients:
Whisk them until they’re perfectly blended and free of lumps.
Whip Eggs and Sugar
Crack 4 large eggs into a mixing bowl. Whip them until they’re super frothy and light. Slowly sprinkle in 3/4 cup granulated sugar while continuing to beat. Drizzle in 1 Tbsp of oil and keep mixing.
Add Wet Ingredients
Pour in these liquid friends:
Stir everything until the color is bright and even.
Combine Mixtures
Fold your dry ingredient mixture into the wet ingredients. Mix gently until just combined. Don’t overmix or your cake will get tough.
Bake the Cake
Pour the batter into your prepared pan. Spread it evenly with a spatula. Slide the pan into the 350°F oven and bake for 13-15 minutes. The cake should spring back when you touch it lightly.
First Roll
As soon as the cake comes out of the oven, flip it onto a piece of parchment paper dusted with powdered sugar. Carefully roll the cake up starting from the short end. Let it cool completely on a wire rack.
Prepare Cream Cheese Filling
In a clean bowl, beat these ingredients until smooth:
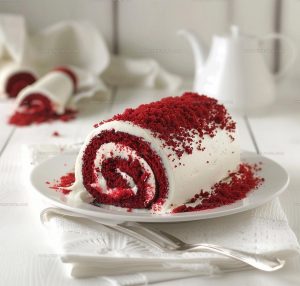
Fill and Roll
Unroll the cooled cake carefully. Spread the cream cheese filling evenly across the surface. Roll the cake up again, this time with the filling inside.
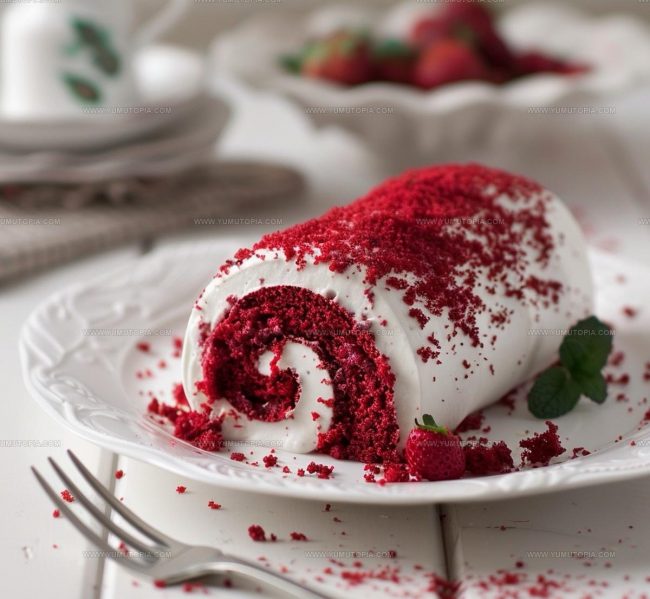
Chill and Serve
Wrap the cake roll in plastic wrap and refrigerate for at least an hour. When ready, slice and serve chilled. Dust with a bit of powdered sugar if you’re feeling fancy.
Reliable Tips for Rolled Red Velvet Cake
Alternate Versions of Red Velvet Roll Cake
How to Serve Red Velvet Roll Cake
Storage Guide for Red Velvet Roll Cake
Red Velvet Roll Cake Frequently Asked Questions
Can I make this cake roll ahead of time?
Absolutely! Prepare the cake roll up to two days before serving. Wrap it tightly in plastic wrap and store in the refrigerator to keep the texture perfect and flavors fresh.
What if my cake cracks when rolling?
Don’t worry. Rolling the cake while it’s still warm helps prevent cracking. If small cracks happen, the cream cheese frosting will cover them beautifully and no one will notice.
Does the type of cocoa powder matter?
Natural or Dutch-processed cocoa works well. Dutch-processed cocoa will give a deeper chocolate flavor and darker color to your red velvet cake roll.
How do I get the brightest red color?
Use gel food coloring instead of liquid. Gel concentrates provide a more vibrant red without changing the cake’s consistency. Start with a small amount and add more as needed.
Can I freeze this cake roll?
Yes! Wrap the cake roll tightly in plastic wrap and then aluminum foil. Freeze for up to one month. Thaw in the refrigerator overnight before serving.
Rolled Red Velvet Cake Recipe
- Total Time: 28-30 minutes
- Yield: 8 to 10 1x
Description
Red Velvet Cake Roll brings pure Southern charm straight to your dessert table with its swirled cream cheese filling and tender chocolate-kissed cake. Rolled with care and topped with a light dusting of powdered sugar, this classic treat delivers pure comfort in each delightful slice.
Ingredients
Main Ingredients:
- 4 large eggs
- ¾ cup all-purpose flour
- ¾ cup granulated sugar
- ¼ cup unsweetened cocoa powder
Supporting Ingredients:
- 1 tablespoon oil
- 2 tablespoons buttermilk
- 2 tablespoons red food coloring
- 1 teaspoon white distilled vinegar
- 1 teaspoon vanilla extract
Stabilizing Ingredients:
- 1 teaspoon baking powder
- ½ teaspoon salt
Instructions
- Warm your oven to 350°F and line a 15×10-inch jelly roll pan with parchment paper, ensuring your edges are completely covered.
- Sift ¾ cup flour, ¼ cup cocoa powder, 1 tsp baking powder, and ½ tsp salt into a medium mixing bowl, creating a smooth, clump-free dry mixture.
- Crack 4 large eggs into a separate large bowl and whip them until they become light and frothy, then gradually sprinkle in ¾ cup granulated sugar while continuing to beat until the mixture becomes thick and pale.
- Gently fold in 1 Tbsp oil, 2 Tbsp buttermilk, 1 tsp vinegar, 1 tsp vanilla extract, and 2 Tbsp red food coloring until your batter reaches a vibrant crimson shade.
- Carefully incorporate the dry ingredients into the wet mixture, stirring until just combined and no flour streaks remain.
- Pour the batter into your prepared pan, using a spatula to spread it evenly across the surface, creating a smooth, thin layer.
- Bake for 13-15 minutes, watching carefully until the cake springs back when lightly touched and edges start to pull away from the pan.
- Immediately after removing from the oven, dust a clean kitchen towel with powdered sugar and carefully invert the hot cake onto the towel.
- Peel off the parchment paper and quickly roll the cake with the towel, starting from the short end, and let it cool completely for about 30 minutes.
- For the filling, beat 8 oz cream cheese and ½ cup butter until smooth, then gradually mix in 1 cup powdered sugar and 1 tsp vanilla.
- Unroll the cooled cake, spread the cream cheese filling evenly, then carefully re-roll the cake without the towel.
- Wrap the cake roll in plastic wrap and refrigerate for at least 1 hour before slicing and serving chilled.
Notes
- Cold ingredients can make your cake dense, so let eggs and cream cheese sit at room temperature for easier mixing.
- Precise baking time matters – check at 13 minutes and remove cake when it springs back lightly when touched.
- Rolling the warm cake prevents cracking and helps create a smooth, flexible texture for your final roll.
- For a lighter version, substitute Greek yogurt for cream cheese and use less sugar in the frosting to reduce calories.
- Prep Time: 15 minutes
- Cook Time: 13-15 minutes
- Category: Cakes
- Method: Baking
- Cuisine: American
Nutrition
- Serving Size: 8 to 10
- Calories: 344 kcal
- Sugar: 33 g
- Sodium: 219 mg
- Fat: 24 g
- Saturated Fat: 12 g
- Unsaturated Fat: 10 g
- Trans Fat: 0.3 g
- Carbohydrates: 27 g
- Fiber: 1.5 g
- Protein: 6 g
- Cholesterol: 85 mg
Madison Wyman
Recipe Developer & Food Storyteller
Expertise
Recipe Research and Adaptation, Food Writing and Cultural Storytelling, Sustainable and Ethical Sourcing, Dietary Adaptations (e.g., gluten-free, plant-based)
Education
Oregon Health & Science University
Portland Community College
Madison’s passion for flavor and culture ignited amidst the rich Southern cooking traditions of her upbringing, where cherished family recipes told delicious tales.
Armed with a Master’s in Food Systems and Society from Oregon Health & Science University and a Culinary Arts Certificate from Portland Community College, Madison truly excels at transforming rich, intricate flavors into dishes that are both approachable and heartfelt.
For her, cooking is a vibrant blend of science, art, and heritage – a powerful way to connect us to our roots and each other. Her recipes invite you to delve deeper, uncovering the fascinating stories woven into every ingredient.