Russian Honey Cake Medovik Recipe With Silky Cream
Russian Honey Cake Medovik is a beloved dessert that has graced celebration tables across Eastern Europe for generations.
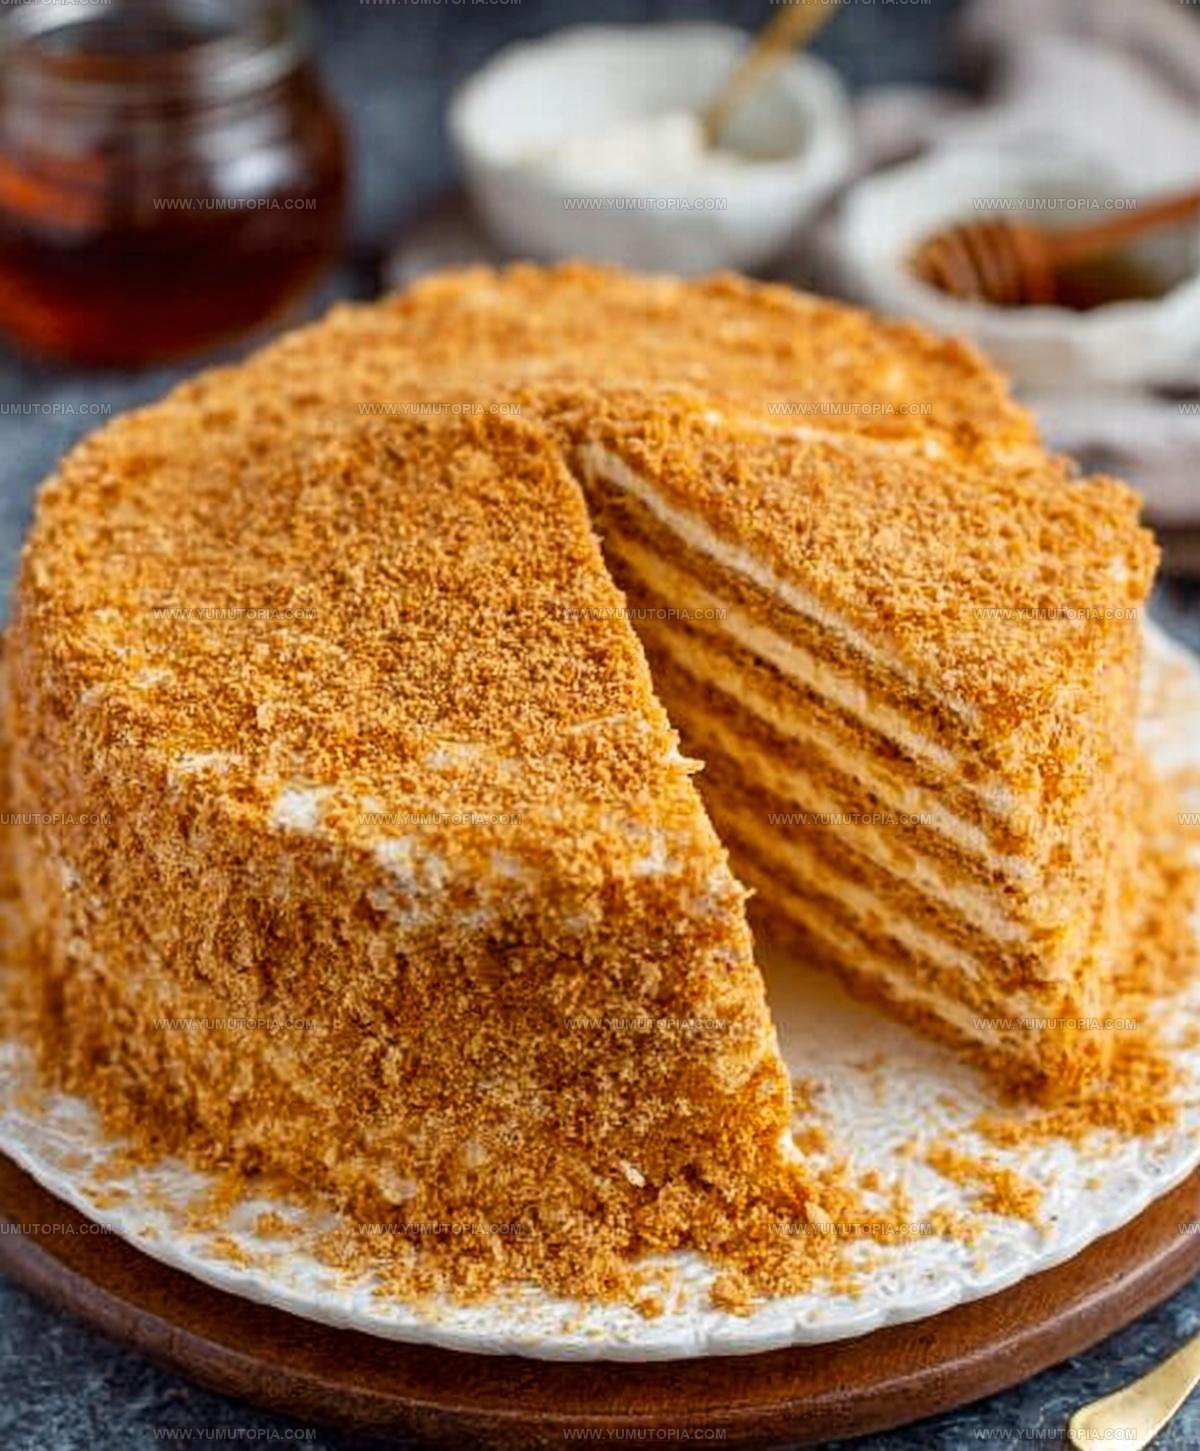
Thin, delicate layers come together with luxuriously smooth cream to form something truly special.
The subtle sweetness paired with a hint of caramelized warmth makes every bite memorable.
The contrast between soft, melt-in-your-mouth textures and rich flavor creates an experience that feels both comforting and elegant.
Learning to make it at home means you can share a taste of tradition whenever the occasion calls for something impressive.
Every slice reveals beautiful striped layers that look as stunning as they taste, making it perfect when you want to serve something that stands out.
Time spent in the kitchen will reward you with a showstopping dessert that guests will remember long after the last crumb disappears.
What Makes Russian Honey Cake Medovik So Layered and Luxurious
Core Ingredients for Russian Honey Cake
Cake Layers:Cream Filling:Best Tools for Russian Honey Cake Medovik
Russian Honey Cake Medovik Baking Instructions
Prep the Base
Grab your mixer and blend 1/2 cup unsalted butter, 1/2 cup honey, and 1/2 cup granulated sugar until the mixture looks smooth and fluffy. Your arm might get tired, but keep mixing until everything looks light and creamy.
Add Eggs
Drop in 2 large eggs one at a time, mixing thoroughly after each addition. Make sure your eggs blend completely into the butter mixture.
Create Dry Mix
In a separate bowl, sift together 2 cups all-purpose flour, 1 tsp baking soda, 1 tsp vanilla extract, and 1/4 tsp salt. This helps prevent any lumpy surprises in your cake.
Combine Mixtures
Slowly fold your dry ingredients into the wet mixture. Stir until a soft dough forms that looks uniform and feels slightly sticky.
Divide and Rest
Split your dough into 8-10 equal pieces. Let these portions rest for about 10 minutes so the dough becomes easier to work with.
Roll Out Layers
On parchment paper, roll each dough portion super thin – we’re talking about 1/8 inch thick. Think of making delicate paper-thin circles.
Bake Layers
Slide each rolled layer onto a baking sheet and pop into a 350°F oven for 4-5 minutes. Watch closely – you want golden edges but not burned spots.
Cool Cake Layers
Transfer baked layers to wire racks and let them cool completely. Patience matters here.
Prepare Cream
Whip 1 cup heavy cream with 1/4 cup powdered sugar until stiff peaks appear. Then gently fold in 2 cups sour cream until the mixture looks smooth.
Layer and Stack
Carefully spread cream between each cake layer, building your cake with precision. Stack them neatly, making sure each layer is even.
Final Cream Coat
Cover the entire cake with remaining cream mixture, creating a smooth exterior.
Refrigerate
Stick the cake in the refrigerator for 6-8 hours. This helps the layers soften and the flavors meld together.
Decorative Finish
Crush one cake layer into fine crumbs. Sprinkle these crumbs over the top of your cake for a rustic, homemade look.
Kitchen Know-How for Russian Honey Cake
Russian Honey Cake with Layer and Sweetness Variations
Sweet Ways to Enjoy Russian Honey Cake
Best Storage Method For Russian Honey Cake
Russian Honey Cake Medovik FAQs
Is Russian Honey Cake difficult to make?
This recipe requires patience and technique, but anyone willing to practice can create beautiful layers with careful rolling and gentle handling of delicate cake discs.
Can hand mixers work for this recipe?
A stand mixer helps create smoother textures, but hand mixers definitely work well for blending butter, honey, and whipping cream perfectly.
How thin should cake layers be?
Layers need to be almost transparent, around 1/8 inch thick, which helps create that signature delicate texture characteristic of authentic Medovik.
Does honey type matter for this recipe?
Traditional Russian recipes prefer wildflower or buckwheat honey, but any pure honey works wonderfully. Select a honey with robust flavor for best results.
Can the cake be made ahead of time?
Absolutely! Preparing the cake one day before serving allows cream layers to soften and flavors to develop beautifully, making it an excellent make-ahead dessert.
Why do cake layers need to rest between rolling?
Resting helps gluten relax, making dough easier to roll and preventing layers from shrinking or becoming tough during baking.

Russian Honey Cake Medovik Recipe
- Total Time: 7 hours 10-20 minutes
- Yield: 8 1x
Description
Layered russian Honey Cake (Medovik) brings sweet memories of grandma’s kitchen straight to your table. Delicate honey-infused cake layers melt together with creamy filling, creating a classic dessert that connects generations.
Ingredients
Cake Base:
- 2 cups all-purpose flour
- ½ cup honey
- ½ cup unsalted butter
- 2 large eggs
- 1 tsp baking soda
Sweeteners and Enhancers:
- ½ cup granulated sugar
- ¼ cup powdered sugar
- 1 tsp vanilla extract
- ¼ tsp salt
Creamy Components:
- 2 cups sour cream
- 1 cup heavy cream
Instructions
- Blend ½ cup softened butter, ½ cup honey, and ½ cup sugar in a bowl until creamy and pale.
- Crack 2 eggs into the mixture, whisking thoroughly after each addition.
- Sift 2 cups flour, 1 tsp baking soda, and ¼ tsp salt together in a separate bowl.
- Combine dry ingredients with butter mixture, kneading until a uniform dough develops.
- Separate dough into 8-10 equal portions and allow to rest for 10 minutes at room temperature.
- Roll each dough section on parchment paper into paper-thin rounds measuring exactly ⅛ inch thick.
- Place each round on a baking sheet and bake at 350°F for precisely 4-5 minutes until edges turn golden brown.
- Transfer baked layers to wire racks, letting them cool completely.
- Whip 1 cup heavy cream with ¼ cup powdered sugar until firm peaks emerge.
- Gently fold 2 cups sour cream into whipped cream until completely smooth.
- Layer cake by spreading cream mixture between each delicate disc.
- Coat entire cake exterior with remaining cream blend.
- Refrigerate cake for 6-8 hours so layers can soften and meld together.
- Crush one cake layer into fine, uniform crumbs using your hands.
- Dust cake top generously with reserved crumb mixture before serving.
Notes
- Chill your mixing bowl and whisk before whipping cream to help it reach stiff peaks faster and maintain structure.
- Roll dough layers as thin as possible using parchment paper to ensure delicate, crisp texture typical of traditional Medovik.
- Room temperature ingredients create smoother batter and more consistent cake layers, so take butter and eggs out of refrigerator 30 minutes before starting.
- Use a pizza cutter or sharp knife to trim cake layers into perfect circles while they’re still warm for clean, professional-looking edges.
- Prep Time: 30 minutes
- Cook Time: 40-50 minutes
- Category: Cakes
- Method: Baking
- Cuisine: Russian
Nutrition
- Serving Size: 8
- Calories: 448
- Sugar: 38 g
- Sodium: 165 mg
- Fat: 29 g
- Saturated Fat: 17 g
- Unsaturated Fat: 10 g
- Trans Fat: 0.5 g
- Carbohydrates: 44 g
- Fiber: 1.2 g
- Protein: 5 g
- Cholesterol: 95 mg
Logan Lemaster
Founder & Culinary Innovator
Expertise
Recipe Development and Innovation, Menu Design and Optimization, Fine Dining Techniques, Ingredient Pairing and Flavor Science
Education
Metropolitan Culinary Arts Institute
Logan’s culinary journey kicked off in his vibrant Chicago family kitchen, where fresh, seasonal ingredients and bold flavors were always front and center.
After graduating from the Metropolitan Culinary Arts Institute in Arlington, Virginia, and honing his skills in renowned restaurants, Logan mastered the art of blending classic techniques with exciting, modern twists.
His kitchen is a dynamic lab for flavor exploration. Through Yum Utopia, Logan aims to empower you to cook with both confidence and creativity, turning simple ingredients into spectacular meals.