
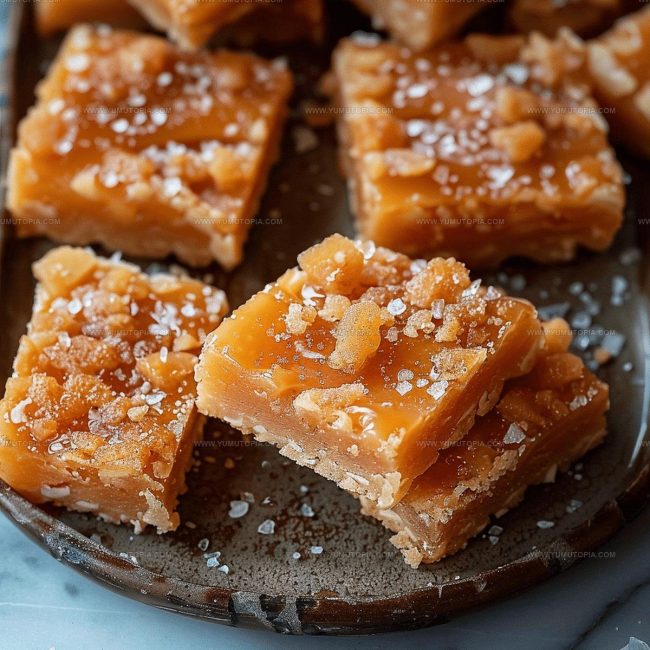
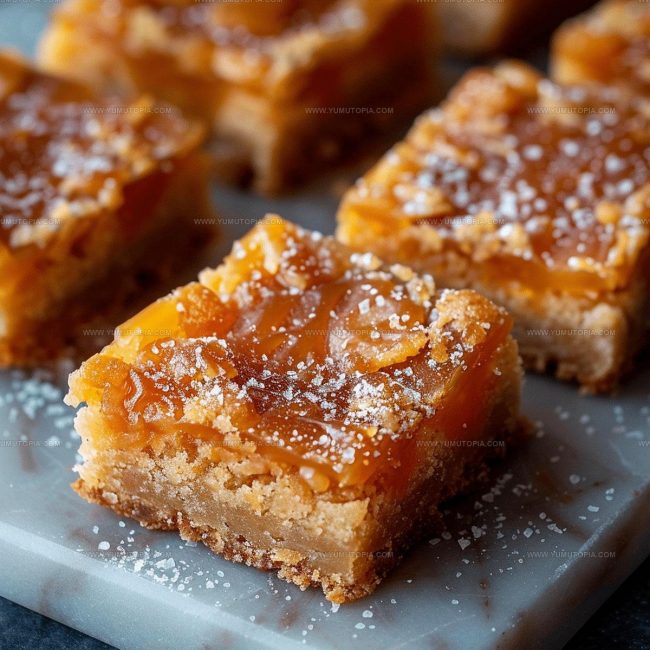
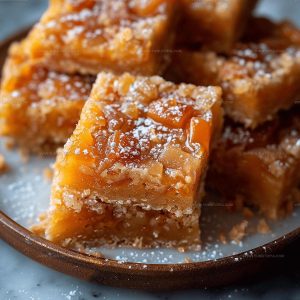
Salted Caramel Butter Bars Recipe for Sweet Tooth Cravings
Craving salted caramel butter bars that melt in your mouth? Prepare for a decadent treat that redefines sweet indulgence.
Rich, buttery layers promise pure dessert magic with every single bite.
Comfort and luxury collide in this irresistible recipe that feels like a warm culinary hug.
Dessert enthusiasts and casual sweet lovers alike will find themselves enchanted by these incredible bars.
Smooth caramel and delicate salt create a perfect harmony that dances across your palate.
Baking something extraordinary doesn’t require professional skills—just passion and simple ingredients.
Your next favorite dessert is waiting to become a household sensation.
What Makes Salted Caramel Butter Bars So Rich
Which Ingredients Are Necessary for Salted Caramel Butter Bars
Base Ingredients:Caramel Filling:Optional Flavor Boosters:Simple Kitchen Equipment for Salted Caramel Butter Bars
Cooking Method for Salted Caramel Butter Bars
Warm Up the Oven
Heat the oven to 325F (165C). Grab a 9×13-inch baking dish and line it with parchment paper, letting the edges hang over so you can easily lift out the bars later.
Create the Butter Base
Grab a large mixing bowl and blend 1 pound (2 cups) softened unsalted butter, 1 cup granulated sugar, and 1 1/2 cups powdered sugar until the mixture looks light and fluffy. This should take about 2-3 minutes. Pour in 1 tablespoon vanilla extract and mix thoroughly.
Mix in the Flour
Slowly add 4 cups all-purpose flour to the butter mixture. Stir until a soft dough forms. Don’t overmix – you want the dough to come together gently.
Prepare the First Layer
Take about two-thirds of the dough and press it evenly into the bottom of your prepared baking dish. Make sure the layer is smooth and reaches all the corners. Slide the pan into the preheated oven and bake for 20 minutes, until the edges look lightly golden.
Melt the Caramel
While the base bakes, grab a microwave-safe bowl and toss in the caramel ingredients:
Heat these in 30-second bursts, stirring between each interval, until the mixture becomes smooth and creamy. Optional: Stir in some extras if you like:
Add the Caramel Layer
Pour the melted caramel evenly over the baked base. Sprinkle 1-2 teaspoons of flaky sea salt across the top, adjusting to your taste preference.
Create the Crumbly Topping
Take the remaining dough and crumble it over the caramel layer. Leave some caramel peeking through for a pretty effect.
Final Bake
Return the pan to the oven and bake for 25-30 minutes. You’re looking for a golden-brown top and caramel bubbling around the edges.
Cool and Slice
Let the bars cool completely in the pan. Once cool, use the parchment paper handles to lift the entire batch out. Slice into squares and serve. Optional: Drizzle with melted chocolate if you’re feeling fancy.
Helpful Cooking Notes For Salted Caramel Butter Bars

Popular Variations Of Salted Caramel Butter Bars
Best Serving Options For Salted Caramel Butter Bars
Best Storage Practices For Salted Caramel Butter Bars
Salted Caramel Butter Bars Q&A
Can I make this recipe ahead of time?
These bars are perfect for making a day or two before serving. Just cover them tightly and store at room temperature, and they’ll stay deliciously fresh.
Do I need special equipment to make these bars?
Not at all! A standard electric mixer, mixing bowls, and a 9×13-inch baking pan are all you need to create these amazing treats.
How do I know when the base is properly baked?
Look for a light golden color around the edges. The center should look set but not dark – about 20 minutes typically does the trick.
Can I substitute the caramels?
Wrapped caramel candies work best, but in a pinch, you could use jarred caramel sauce. Just adjust the heating method and watch the consistency carefully.
What kind of salt works best for topping?
Flaky sea salt is fantastic for this recipe. It provides a perfect crunchy texture and sharp salty contrast to the sweet caramel.
How thick should the dough layers be?
Press the base layer evenly, about 1/4 inch thick. The crumble top should be loosely scattered to let caramel peek through.
Salted Caramel Butter Bars Recipe
- Total Time: 1 hour 13 minutes – 1 hour 23 minutes
- Yield: 12 1x
Description
Salted Caramel Butter Bars deliver pure comfort straight from your kitchen, melting with rich buttery goodness and that perfect sweet-salty balance. Rich golden layers of caramel and tender shortbread create a delightful treat your friends and family will absolutely adore.
Ingredients
Main Ingredients:
- 4 cups all-purpose flour
- 1 pound unsalted butter
- 1 cup granulated sugar
Supporting Ingredients:
- 1.5 cups powdered sugar
- 1 tablespoon vanilla extract
Finishing Ingredients:
- 1 (14 ounces) bag soft caramel candies
- ⅓ cup heavy cream
- 1.5 teaspoons flaky sea salt
- ½ cup chopped pecans
- ½ teaspoon ground cinnamon
- Chocolate chips or melted chocolate for drizzle
Instructions
- Grab a 9×13-inch baking dish and line it with parchment paper, ensuring extra paper hangs over the edges for easy bar removal.
- Combine 2 cups softened unsalted butter, 1 cup granulated sugar, and 1½ cups powdered sugar in a mixing bowl. Cream these ingredients until the mixture becomes light and airy, about 2-3 minutes.
- Pour 1 tablespoon vanilla extract into the butter mixture and blend thoroughly.
- Gradually incorporate 4 cups all-purpose flour, stirring until a soft, cohesive dough forms.
- Press two-thirds of the dough firmly into the prepared pan, creating an even base layer. Slide the pan into a 325°F oven and bake for 20 minutes until the surface turns a delicate golden color.
- Unwrap a 14-oz bag of soft caramel candies and place them in a microwave-safe bowl with ⅓ cup heavy cream.
- Microwave the caramels in 30-second bursts, stirring between each interval, until the mixture becomes completely smooth and glossy.
- Pour the melted caramel evenly across the baked base, making sure to cover the surface completely.
- Sprinkle 1-2 teaspoons of flaky sea salt across the caramel layer, adjusting to your personal taste preference.
- Crumble the remaining dough over the caramel, allowing some of the golden caramel to peek through the topping.
- Return the pan to the 325°F oven and bake for 25-30 minutes, watching for a golden-brown top and bubbling caramel edges.
- Remove from the oven and let the bars cool completely inside the pan to allow the caramel to set properly.
- Use the parchment paper edges to lift the entire dessert out of the pan and slice into individual bars.
Notes
- Salt matters big time for balancing the sweetness, so use good quality flaky sea salt for the best flavor contrast.
- Chilling the dough before pressing into the pan helps create a more stable and crisp shortbread base that won’t crumble.
- For gluten-free friends, swap the regular flour with a cup-for-cup gluten-free blend to make this treat accessible to everyone.
- Caramels can burn quickly, so watch carefully when melting and stir frequently to prevent scorching.
- Prep Time: 28-33 minutes
- Cook Time: 45-50 minutes
- Category: Dessert Bars
- Method: Baking
- Cuisine: American
Nutrition
- Serving Size: 12
- Calories: 393
- Sugar: 27 g
- Sodium: 95 mg
- Fat: 25 g
- Saturated Fat: 15 g
- Unsaturated Fat: 9 g
- Trans Fat: 1 g
- Carbohydrates: 40 g
- Fiber: 1 g
- Protein: 3 g
- Cholesterol: 60 mg
Logan Lemaster
Founder & Culinary Innovator
Expertise
Recipe Development and Innovation, Menu Design and Optimization, Fine Dining Techniques, Ingredient Pairing and Flavor Science
Education
Metropolitan Culinary Arts Institute
Logan’s culinary journey kicked off in his vibrant Chicago family kitchen, where fresh, seasonal ingredients and bold flavors were always front and center.
After graduating from the Metropolitan Culinary Arts Institute in Arlington, Virginia, and honing his skills in renowned restaurants, Logan mastered the art of blending classic techniques with exciting, modern twists.
His kitchen is a dynamic lab for flavor exploration. Through Yum Utopia, Logan aims to empower you to cook with both confidence and creativity, turning simple ingredients into spectacular meals.