Salted Honey Pie Recipe for Golden Sweet Indulgence
Sweet and sophisticated, salted honey pie captures the essence of comfort desserts with an unexpected twist.
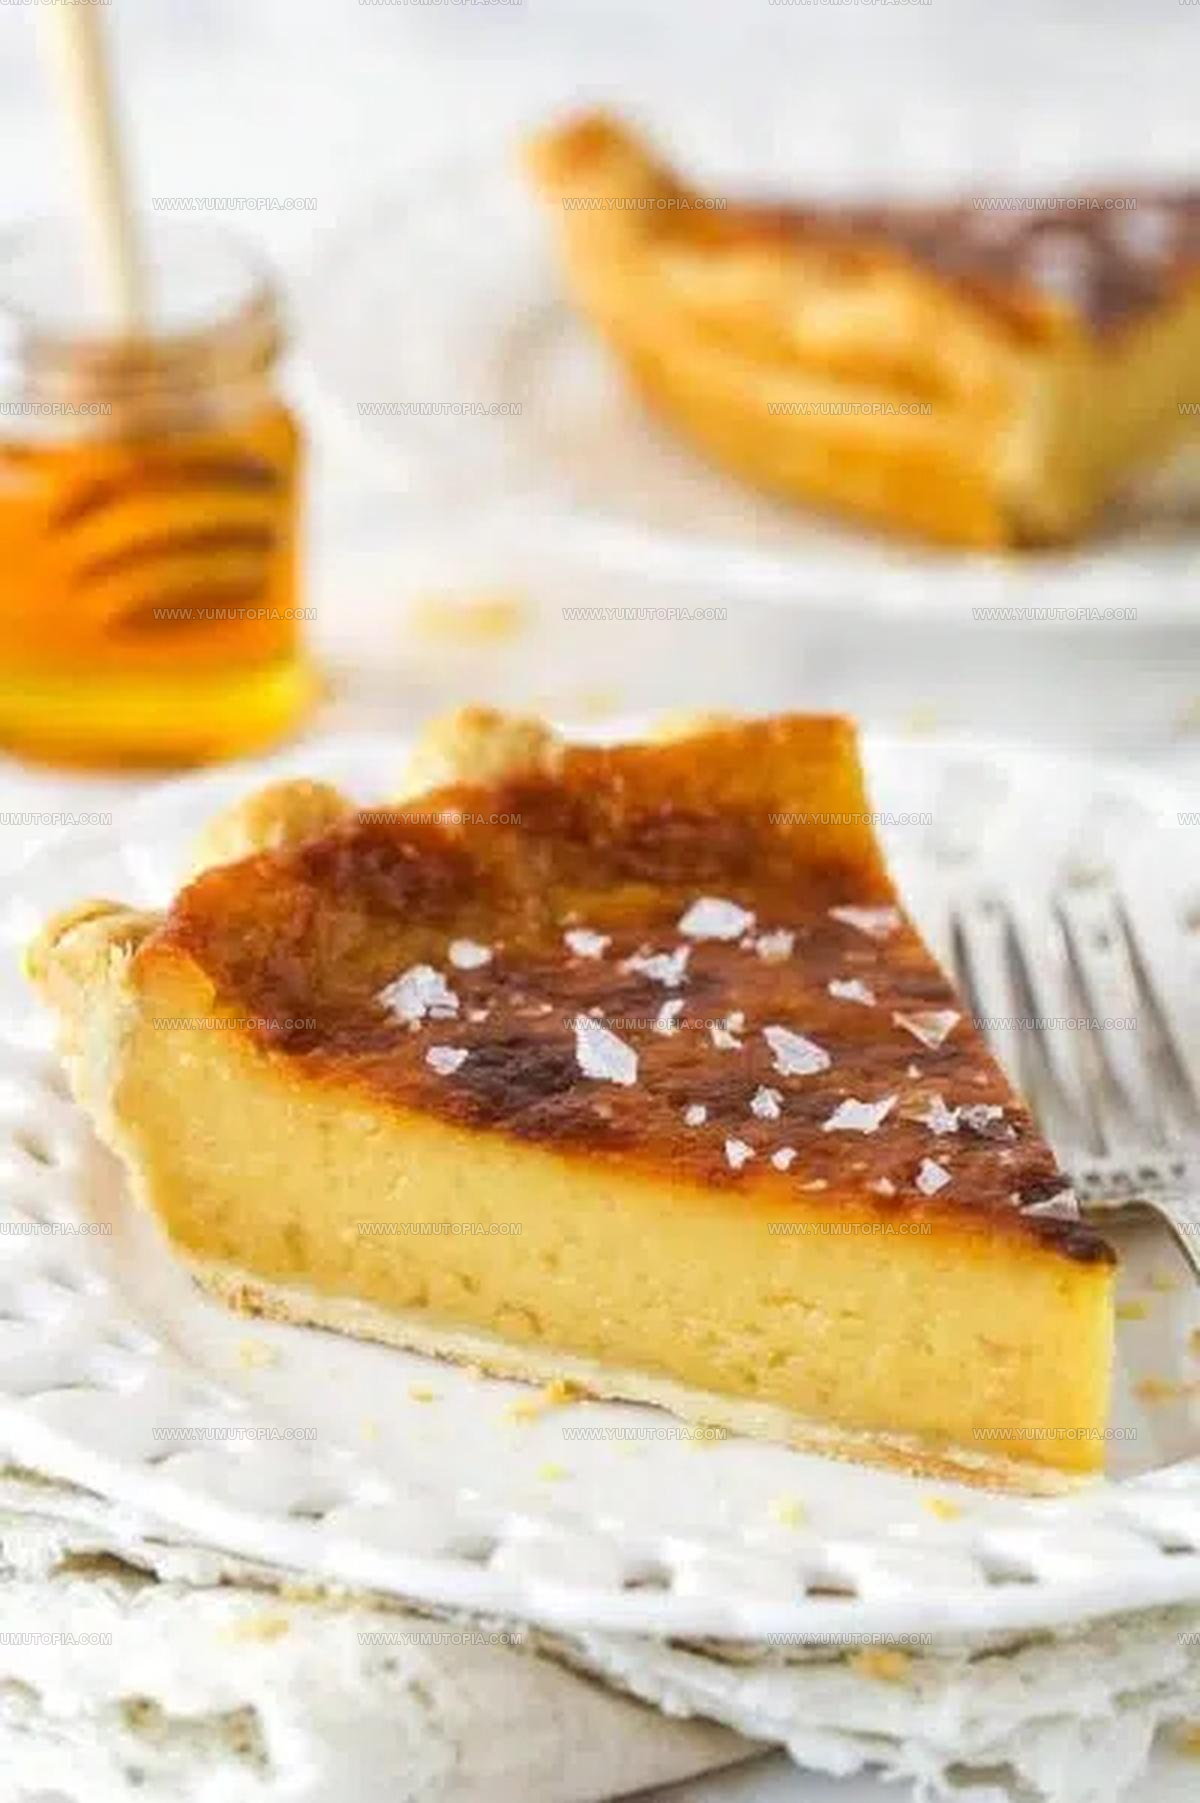
Luxurious golden nectar meets delicate salt crystals in a decadent pastry that promises pure enjoyment.
Southern bakeries and trendy urban cafes have embraced this delightful creation for good reason.
Its rich flavor profile balances delicate sweetness with subtle mineral undertones that dance across your palate.
Smooth custard nestled in a buttery crust creates a sensory experience worth savoring.
Home bakers and dessert enthusiasts adore how simple ingredients can produce such remarkable results.
Standout Features Of Salted Honey Pie
Core Ingredients of Cranberry Apple Sweet Potatoes
Pie Crust:Filling Base:Flavor Enhancers:Prep Tools For This Salted Honey Pie
Preparing Salted Honey Pie Step By Step

Prep the Pie Pan
Grab an 8-inch or 9-inch deep dish pie pan and nestle your pie crust inside. Tuck it into the refrigerator to keep it nice and cool while you work on the filling.
Heat the Cream Mixture
Grab a medium saucepan and combine these ingredients:
Warm this mixture over medium heat, stirring constantly until it reaches a rolling boil. Keep your eye on the pot – you’ll notice it starting to thicken up.
Prepare the Egg Yolks
Crack 4 large egg yolks into a big mixing bowl. Have your whisk ready for some action.
Temper the Eggs
Take the hot cream mixture off the heat. Slowly drizzle a small amount into the egg yolks, whisking like crazy to prevent scrambling. Add a bit more cream, continuing to whisk. Pour in the remaining cream mixture and stir until everything looks smooth and combined.
Add Sweet Flavors
Stir in these delicious ingredients:
Mix until everything is well blended.
Fill and Bake
Preheat your oven to 375°F. Pour the custard into the chilled pie crust. Slide it into the oven and bake for 40-45 minutes. The top will start to brown, and the filling will bubble up.
Cool and Set
Pull the pie out of the oven – it’ll look wobbly, but don’t worry. Let it cool completely on the counter. The pie will firm up as it sits.
Chill and Finish
Refrigerate the pie until it’s completely cold and set. Just before serving, sprinkle some flaky sea salt on top for that perfect sweet-salty finish.
Useful Notes For Salted Honey Pie
Different Takes on Salted Honey Pie
Best Serving Options for Salted Honey Pie
Proper Recipe Storage for Salted Honey Pie
Questions And Answers About Salted Honey Pie
What does tempering eggs mean?
Tempering eggs prevents them from scrambling by slowly raising their temperature with hot liquid, creating a smooth, silky custard without lumps.
Can I use table salt instead of sea salt?
Sea salt provides a crunchy texture and distinct flavor. Table salt works, but it won’t give the same finishing touch or elegant presentation.
How do I know when the custard is ready?
The cream mixture should reach a full rolling boil and start to thicken. Stir continuously to prevent burning and ensure a smooth consistency.
Why does the pie look wobbly after baking?
The pie will be jiggly when first removed from the oven. As it cools to room temperature, it firms up and sets properly, creating the perfect creamy texture.
What type of honey works best?
Choose a high-quality honey with a flavor profile you enjoy. Wildflower or clover honey are excellent options that complement the pie’s sweet and salty balance.

Sea Salt Finish Salted Honey Pie Recipe
- Total Time: 1 hour 15 minutes
- Yield: 8 1x
Description
Salted Honey Pie delivers a delightful balance of sweet and salty flavors that dance across your taste buds. Baked with golden honey and a touch of sea salt, this Southern-style treat brings pure comfort to your dessert table.
Ingredients
Main Ingredients:
- 2 ½ cups heavy whipping cream
- 4 large egg yolks
- ½ cup honey
- ⅔ cup light brown sugar
Supporting Ingredients:
- ⅓ cup cornstarch
- 2 teaspoons vanilla extract
- ½ teaspoon salt
Garnish:
- 1 pie crust
- Flakey sea salt
Instructions
- Nestle your refrigerated or homemade pie crust into an 8-inch or 9-inch deep dish pie pan. Slide the pan into the refrigerator to chill while preparing the filling.
- Preheat your oven to precisely 375°F, ensuring an accurate temperature for perfect baking.
- Crack 4 large egg yolks into a spacious mixing bowl, setting them aside for later use.
- Combine 2 ½ cups heavy cream, ⅔ cup brown sugar, ⅓ cup cornstarch, and ½ teaspoon salt in a medium saucepan over medium heat.
- Stir the mixture continuously until it reaches a vigorous rolling boil and begins to thicken noticeably.
- Remove the cream mixture from heat and carefully temper the egg yolks by slowly whisking in small amounts of the hot liquid.
- Pour the remaining cream mixture into the eggs, stirring until the custard becomes completely smooth and integrated.
- Mix in ½ cup honey and 2 teaspoons vanilla extract, blending thoroughly into the custard.
- Transfer the silky custard into the chilled pie crust, spreading evenly to the edges.
- Bake for exactly 40-45 minutes, watching the top turn golden brown and the filling become slightly bubbly.
- Pull the pie from the oven when it’s still slightly jiggly in the center. Let it rest at room temperature to set naturally.
- Refrigerate the pie until completely chilled and firm to the touch.
- Just before serving, sprinkle a delicate layer of flakey sea salt across the pie’s surface for that perfect sweet-salty contrast.
Notes
- Chill the pie crust thoroughly before filling to prevent a soggy bottom and ensure a flaky texture.
- Tempering the eggs slowly prevents scrambling and creates a smooth, silky custard that sets perfectly.
- Use high-quality honey for the best flavor, preferably a local or artisan variety with complex notes.
- For a gluten-free version, swap the traditional pie crust with a nut-based or gluten-free graham cracker crust to maintain the dessert’s rich texture.
- Prep Time: 15 minutes
- Cook Time: 45 minutes
- Category: Pies
- Method: Baking
- Cuisine: American
Nutrition
- Serving Size: 8
- Calories: 450 kcal
- Sugar: 45 g
- Sodium: 200 mg
- Fat: 30 g
- Saturated Fat: 18 g
- Unsaturated Fat: 10 g
- Trans Fat: 0.5 g
- Carbohydrates: 50 g
- Fiber: 1 g
- Protein: 6 g
- Cholesterol: 150 mg
Logan Lemaster
Founder & Culinary Innovator
Expertise
Recipe Development and Innovation, Menu Design and Optimization, Fine Dining Techniques, Ingredient Pairing and Flavor Science
Education
Metropolitan Culinary Arts Institute
Logan’s culinary journey kicked off in his vibrant Chicago family kitchen, where fresh, seasonal ingredients and bold flavors were always front and center.
After graduating from the Metropolitan Culinary Arts Institute in Arlington, Virginia, and honing his skills in renowned restaurants, Logan mastered the art of blending classic techniques with exciting, modern twists.
His kitchen is a dynamic lab for flavor exploration. Through Yum Utopia, Logan aims to empower you to cook with both confidence and creativity, turning simple ingredients into spectacular meals.