
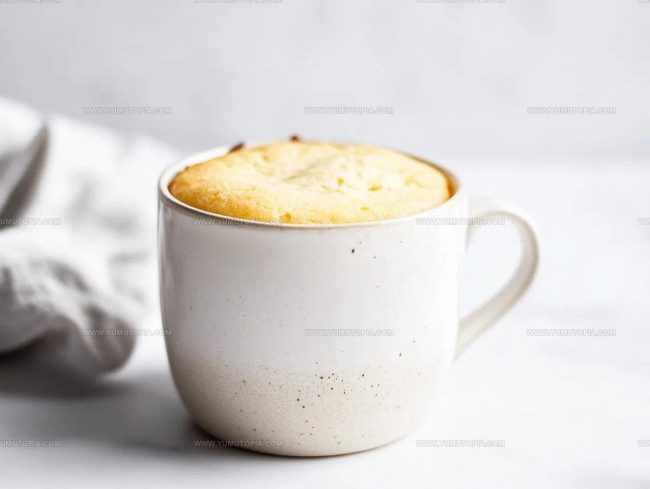
Simple Vanilla Mug Cake Recipe in Just Minutes
Simple vanilla mug cake recipe fans know that sometimes sweet cravings hit when there’s no time for elaborate baking projects.
This single-serving dessert solves that problem by delivering comfort and satisfaction in just minutes.
Perfect for late-night moments, busy weekdays, or anytime a warm treat sounds appealing, it fits seamlessly into any schedule.
The appeal lies in how effortlessly it comes together while still tasting homemade and delicious.
Whether someone lives in a dorm, has a tiny kitchen, or simply wants something sweet without leftovers, this option checks all the boxes.
Kids love helping with it, and adults appreciate how quickly cleanup happens.
When that craving strikes and patience runs thin, having a foolproof solution on hand changes everything for the better.
What Makes Vanilla Mug Cake So Simple
Ingredient Details of Vanilla Mug Cake
Dry Ingredients:Wet Ingredients:Finishing Touch:Tools to Have Ready for Vanilla Mug Cake
How to Bake a Vanilla Mug Cake
Prepare Dry Ingredients
Grab a microwave-safe mug and toss in these dry ingredients:
Use a fork to mix these together until they’re well combined and look like a fluffy, light mixture.
Add Wet Ingredients
Now pour in your liquid friends:
Stir everything with your fork until the batter looks smooth. Make sure to scrape down the sides of the mug so no dry ingredients get left behind.
Add Sprinkle Surprise
Scatter 1 teaspoon of colorful sprinkles across the top of your batter. Give them a gentle stir so they’re distributed throughout.
Microwave Magic
Pop your mug into the microwave and cook at full power for 70-90 seconds. The cake is done when it looks set and has a slightly shiny surface on top.
Rest and Enjoy
Let the mug cake sit in the microwave for 1 minute after cooking. This helps it settle and become the perfect texture. Grab a spoon and dig into your quick, personal-sized treat!
Which Tips Perfect Vanilla Mug Cake
Alternate Versions of Vanilla Mug Cake
How to Serve Vanilla Mug Cake
How to Store Vanilla Mug Cake
Vanilla Mug Cake FAQ Overview
Can I use a different type of milk?
Whole milk works best, but almond, soy, or oat milk can work as substitutes. Just know that the texture might change slightly.
How do I prevent my cake from becoming rubbery?
Avoid overmixing the batter and be careful not to overcook in the microwave. Check at 70 seconds and stop cooking when the top looks set.
Are sprinkles necessary?
Not at all! They’re totally optional but add a fun pop of color and texture. Skip them if you prefer a plain cake.
Can this cake be made gluten-free?
Absolutely! Replace the regular flour with a gluten-free all-purpose flour blend for a similar result.
What size mug should I use?
Choose a mug that’s at least 12 ounces. This gives your cake room to rise without overflowing during cooking.
Can I add other flavors?
Definitely! A dash of cinnamon, cocoa powder, or even a small dollop of peanut butter can transform your basic vanilla mug cake.

Simple Vanilla Mug Cake Recipe
- Total Time: 6.5 minutes
- Yield: 1 to 2 1x
Description
Whipping up a Vanilla Mug Cake takes just minutes when your sweet tooth calls for a quick treat. Grab your favorite mug, mix a few simple ingredients, and enjoy a warm, personal dessert that satisfies your craving in no time.
Ingredients
Primary Ingredients:
- ¼ cup all-purpose flour
- 2 tablespoons sugar
- 2 tablespoons butter
Supporting Ingredients:
- 3 tablespoons milk
- ½ teaspoon vanilla extract
Finishing Ingredients:
- ¼ teaspoon baking powder
- 1 teaspoon sprinkles
- 1 dash salt
Instructions
- Grab a microwave-safe mug and thoroughly combine ¼ cup plus 1 ½ teaspoons flour, 2 tablespoons sugar, ¼ teaspoon baking powder, and a dash of salt using a fork.
- Melt 2 tablespoons butter and add it to the dry mixture along with 3 tablespoons milk and ½ teaspoon vanilla extract. Stir until your batter looks completely smooth and no dry patches remain.
- Sprinkle 1 teaspoon of colorful sprinkles across the top of your cake batter, gently pressing them slightly into the surface.
- Place your mug in the microwave and cook at full power for 80-90 seconds. Your cake is done when it appears set and has a slightly glossy top surface.
- Allow the mug cake to rest inside the microwave for exactly 1 minute after cooking. This helps the cake settle and finish cooking with residual heat.
- Carefully remove the mug using a towel or oven mitt, as it will be hot. Let the cake cool for 2-3 minutes before diving in with a spoon.
Notes
- Swap out regular milk for almond or oat milk to make this dessert dairy-free and friendly for plant-based diners.
- Test your microwave’s power, as cooking times vary – start with 70 seconds and add more time if needed for the perfect texture.
- Use a wider mug to help the cake cook more evenly and prevent overflow during microwaving.
- Add a dollop of whipped cream or a scoop of vanilla ice cream on top for an extra special treat that takes minimal effort to elevate this quick dessert.
- Prep Time: 5 minutes
- Cook Time: 1.5 minutes (90 seconds)
- Category: Cakes
- Method: Microwaving
- Cuisine: American
Nutrition
- Serving Size: 1 to 2
- Calories: 330 kcal
- Sugar: 13 g
- Sodium: 150 mg
- Fat: 19 g
- Saturated Fat: 11 g
- Unsaturated Fat: 7 g
- Trans Fat: 0.5 g
- Carbohydrates: 35 g
- Fiber: 1 g
- Protein: 4 g
- Cholesterol: 55 mg
Madison Wyman
Recipe Developer & Food Storyteller
Expertise
Recipe Research and Adaptation, Food Writing and Cultural Storytelling, Sustainable and Ethical Sourcing, Dietary Adaptations (e.g., gluten-free, plant-based)
Education
Oregon Health & Science University
Portland Community College
Madison’s passion for flavor and culture ignited amidst the rich Southern cooking traditions of her upbringing, where cherished family recipes told delicious tales.
Armed with a Master’s in Food Systems and Society from Oregon Health & Science University and a Culinary Arts Certificate from Portland Community College, Madison truly excels at transforming rich, intricate flavors into dishes that are both approachable and heartfelt.
For her, cooking is a vibrant blend of science, art, and heritage – a powerful way to connect us to our roots and each other. Her recipes invite you to delve deeper, uncovering the fascinating stories woven into every ingredient.