
Smores Marshmallow Bars Recipe To Snack Campfire Style
S’mores Marshmallow Bars bring all the campfire magic straight to your kitchen without needing a single flame.
The combination of chocolate, graham crackers, and fluffy marshmallows creates that beloved flavor everyone craves during summer nights and cozy gatherings.
These bars deliver gooey, sweet satisfaction in every bite while saving you the hassle of outdoor setup.
Perfect for potlucks, baking with children, or satisfying a sudden dessert craving, they come together quickly and disappear even faster.
The nostalgic taste reminds us of childhood adventures while offering convenience that modern life demands.
No camping trip required means you can enjoy this classic treat any day of the week.
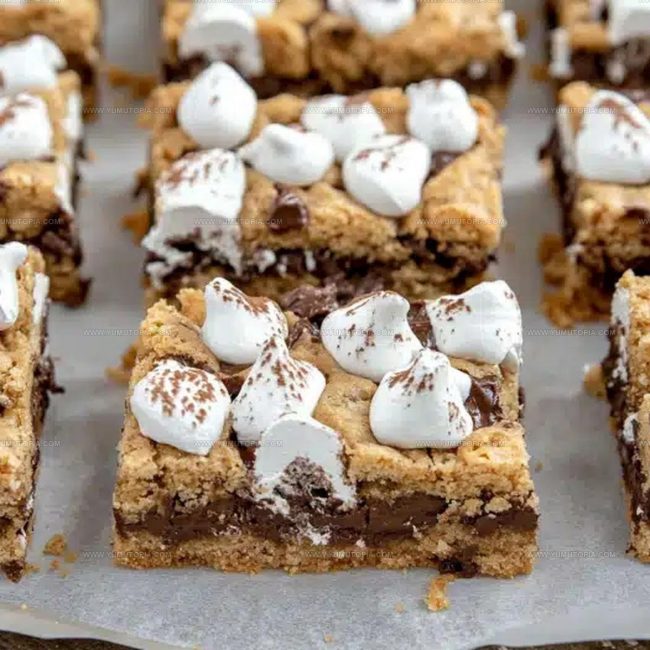
The Gooey, Toasted Campfire Nostalgia of S’mores Marshmallow Bars
Toasted Confectionery, Cocoa Squares, and Crunchy Honey Cracker Bits
Pan Lining Hardware And Layering Tools For Smores Marshmallow Bars
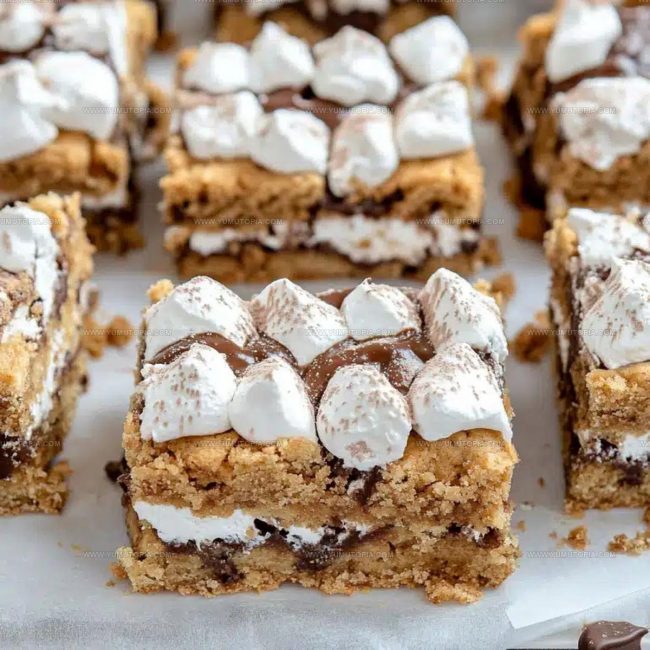
How to Cut Clean Squares of S’mores Marshmallow Bars
Prepare Oven and Pan
Preheat your oven to exactly 350°F (175°C). Get an 8×8 or 9×9-inch baking dish ready by lining it with parchment paper or greasing it lightly.
Make Graham Cracker Crust
Grab a mixing bowl and combine these ingredients:
Mix everything until the mixture feels like damp sand. Press the mixture firmly into your prepared pan, creating an even bottom layer.
First Bake
Slide the pan into the preheated 350°F (175°C) oven. Bake for 8-10 minutes until the crust looks slightly golden. Remove and let it cool for a few minutes.
Chocolate Layer
Sprinkle these ingredients across the warm crust:
Let the chocolate sit for 2-3 minutes so it softens, then gently spread into a smooth, even layer.
Marshmallow Topping
Cover the chocolate layer with:
Optional: Scatter extra chocolate chunks or graham cracker pieces on top for extra texture.
Final Baking
Return the pan to the 350°F (175°C) oven for 7-10 minutes. Watch for marshmallows to become puffy and golden. For deeper color, broil carefully for 1-2 minutes, keeping a close eye to prevent burning.
Cooling and Cutting
Let the bars cool at room temperature for 15-20 minutes. Then refrigerate for 30-60 minutes to help them set completely. Use a sharp knife, wiping it clean between cuts, to slice into neat squares.
Torch and Melt Secrets for the Ultimate S’mores Marshmallow Bars
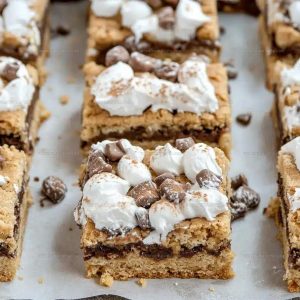
Gooey Twists and Easy S’mores Marshmallow Bar Variations
Gooey Dessert Platter Layouts For S’mores Bars
Gooey Texture Maintenance Tactics For S’mores Bars
Smores Marshmallow Bars Questions and Answers
What makes this recipe different from traditional s’mores?
These bars capture the classic campfire flavor without needing an open flame. The graham cracker crust, melted chocolate, and toasted marshmallow layers give you all the nostalgic s’mores taste in an easy-to-serve dessert.
Can graham crackers be substituted?
Absolutely! Vanilla wafers, digestive biscuits, or crushed cookies work perfectly as an alternative crust. Just ensure they’re finely ground and mixed with melted butter.
How do I get perfectly golden marshmallows?
Watch the marshmallows closely during the final toasting stage. Rotate the pan for even browning, and remove from the oven when they’re puffy and light golden brown.
Should the chocolate be completely melted?
The chocolate should look soft and slightly shiny after spreading. Gentle spreading helps create a smooth chocolate layer that binds with the crust.
Can these bars be made ahead of time?
These bars keep well in an airtight container at room temperature for 2-3 days. For best texture, consume within 24 hours of baking.
Are these bars kid-friendly to make?
Definitely! Kids can help press the crust, sprinkle chocolate chips, and arrange marshmallows. Adult supervision is helpful during the toasting step.
Smores Marshmallow Bars Recipe
- Total Time: 1 hour 13 minutes
- Yield: 9 1x
Description
S’mores Marshmallow Bars have been a campfire favorite that now rock your kitchen counter with zero campfire required! Craving that classic graham cracker, chocolate, and toasted marshmallow combo gets deliciously easy with this simple pan-style treat that brings sweet nostalgia straight to your dessert plate.
Ingredients
Main Ingredients:
- 2 cups graham cracker crumbs
- 1 ½ cups semi-sweet chocolate chips
- 2 cups mini marshmallows
Supporting Ingredients:
- ½ cup unsalted butter
- ¼ cup brown sugar
Finishing Ingredients:
- 1 pinch salt
- Extra graham cracker pieces (optional)
- Extra chocolate chunks (optional)
Instructions
- Prepare your baking space by setting the oven to 350°F (175°C). Line an 8×8-inch pan with parchment, allowing slight overhang for easy removal.
- Mix 2 cups graham cracker crumbs, ½ cup melted butter, and ¼ cup brown sugar in a bowl until the texture resembles damp sand. Press this mixture firmly into the prepared pan.
- Slide the crust into the preheated oven for 9 minutes until the edges turn golden brown. Your kitchen will start smelling wonderfully toasty.
- Remove the crust and immediately scatter 1 ½ cups chocolate chips across the warm surface. Let them melt for 3 minutes, then smooth into an even layer using a spatula.
- Distribute 2 cups mini marshmallows across the chocolate layer, covering every inch. Sprinkle extra chocolate chunks if desired for added texture.
- Return the pan to the oven for 8 minutes, watching carefully as the marshmallows puff and turn golden. For deeper caramelization, switch to broil for 60 seconds.
- Transfer the pan to a cooling rack. Allow the bars to rest at room temperature for 20 minutes, then refrigerate for 45 minutes to help everything set perfectly.
- Lift the bars from the pan using parchment edges. Slice into 16 even squares, cleaning your knife between cuts for neat edges.
Notes
- Use fresh, high-quality graham crackers for the most delicious crust that holds together perfectly.
- Let chocolate chips melt naturally from the residual heat to create a smooth, even layer without stirring too much.
- Watch marshmallows carefully during toasting to achieve that golden-brown color without burning – ovens vary, so keep a close eye.
- For gluten-free friends, swap graham crackers with gluten-free cookie crumbs or ground almonds to maintain the same delectable texture.
- Prep Time: 10 minutes
- Cook Time: 18-22 minutes
- Category: Dessert Bars
- Method: Baking
- Cuisine: American
Nutrition
- Serving Size: 9
- Calories: 271 kcal
- Sugar: 22 g
- Sodium: 69 mg
- Fat: 15 g
- Saturated Fat: 9 g
- Unsaturated Fat: 6 g
- Trans Fat: 0.2 g
- Carbohydrates: 33 g
- Fiber: 2 g
- Protein: 3 g
- Cholesterol: 30 mg
Logan Lemaster
Founder & Culinary Innovator
Expertise
Recipe Development and Innovation, Menu Design and Optimization, Fine Dining Techniques, Ingredient Pairing and Flavor Science
Education
Metropolitan Culinary Arts Institute
Logan’s culinary journey kicked off in his vibrant Chicago family kitchen, where fresh, seasonal ingredients and bold flavors were always front and center.
After graduating from the Metropolitan Culinary Arts Institute in Arlington, Virginia, and honing his skills in renowned restaurants, Logan mastered the art of blending classic techniques with exciting, modern twists.
His kitchen is a dynamic lab for flavor exploration. Through Yum Utopia, Logan aims to empower you to cook with both confidence and creativity, turning simple ingredients into spectacular meals.