
Sweet Cherry Hand Pies Recipe for Quick Fruit Pastries
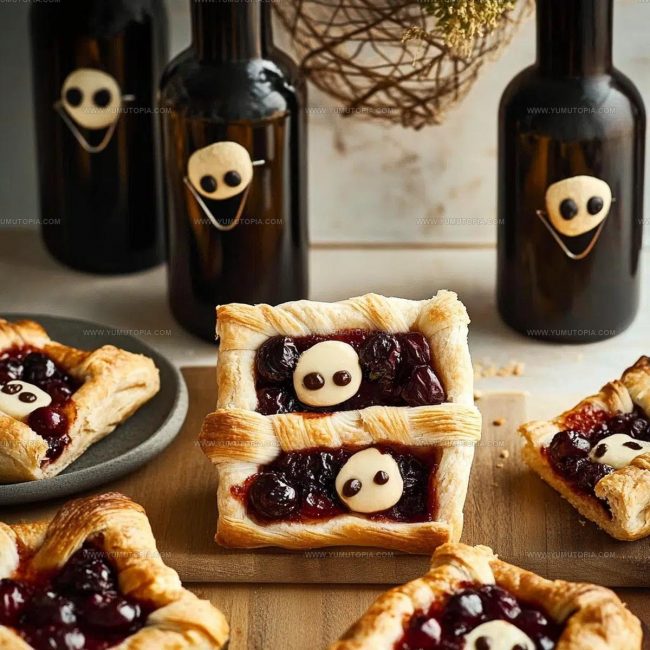
Sweet cherry hand pies are the perfect way to enjoy fruit-filled pastry in a fun, portable form that everyone loves year-round.
These little treats pack all the satisfaction of traditional pie into a cute, handheld size that feels special without any fuss.
Whether you need a dessert for gatherings or just want something delightful with afternoon coffee, they deliver every single time.
The flaky exterior gives way to a jammy filling that tastes like summer no matter the season.
You can bake a batch on lazy weekends or busy weekdays since they come together more easily than you might expect.
Kids go absolutely wild for them, and honestly, adults do too because who can resist personal-sized pastry?
They’re equally at home on fancy dessert tables or packed in lunchboxes for a sweet surprise.
Why Should You Try Cherry Hand Pies
Cherry Hand Pie Ingredients For Juicy, Flaky Perfection
Pastry Ingredients:Fruit Filling Ingredients:Finishing Ingredients:Tools That Shape Professional-Looking Cherry Hand Pies
How to Bake Cherry Hand Pies
Prepare Dough
Grab a large mixing bowl and combine 2 ½ cups (300 g) flour, 1 teaspoon salt, and 1 tablespoon sugar. Cut 1 cup (225 g) cold unsalted butter into small cubes and work it into the flour mixture until it looks like coarse crumbs. Slowly add 6-8 tablespoons of ice water, mixing until the dough comes together. Split the dough into two equal discs, wrap them in plastic, and chill in the refrigerator for 1 hour.
Create Cherry Filling
Toss your pitted cherries into a saucepan with the following ingredients:
Cook the mixture over medium heat, stirring constantly until it thickens. Remove from the stove and stir in 1 teaspoon vanilla extract. Let the filling cool completely.
Roll Out Pastry
Dust your work surface with flour and roll out each dough disc to about ⅛-inch thickness. Use a 4-inch round cutter to create perfect circles for your hand pies.
Fill the Pastry
Place ½ tablespoon of cooled cherry filling in the center of each pastry circle. Fold the dough over to create a half-moon shape. Press the edges together with a fork to seal the pies completely.
Prepare for Baking
Beat 1 egg and brush it over the surface of each hand pie. If desired, sprinkle coarse sugar on top. Cut small slits on the top to allow steam to escape.
Bake the Hand Pies
Arrange the hand pies on a parchment-lined baking sheet. Bake at 375°F (190°C) for 20-25 minutes until the pastry turns a beautiful golden brown. Let them cool for a few minutes before serving – the filling will be extremely hot!
Touches That Enhance Cherry Sweetness And Golden Color
Cherry Hand Pie Variations For Fruity Creativity
Serving Warm Cherry Hand Pies With Old-Fashioned Charm
Storing Hand Pies For Flaky Next-Day Results
Cherry Hand Pie FAQs For Home Pie Makers
Can hand pies be made ahead of time?
Absolutely! My hand pies freeze wonderfully before baking. Prepare them completely, place on a baking sheet, and freeze until solid. Then transfer to a freezer bag. Bake directly from frozen, adding 5-7 minutes to the cooking time.
What if cherries are out of season?
Fresh cherries work best, but frozen cherries are an excellent substitute. Thaw and drain them well before cooking to prevent extra moisture. The flavor remains delicious and consistent.
How do professional bakers create perfect seals?
Carefully press edges with a fork or fingertips. Ensure no filling peeks through, which prevents leaking during baking. A tight seal keeps all those delicious cherry juices inside.
Should hand pies be room temperature when baking?
No, cold dough creates flakier crusts. After assembling, refrigerate pies for 15-20 minutes before baking. Cold butter in the dough creates beautiful layers and crisp edges.
What type of butter works best?
European-style butter with higher fat content produces superior pastry. Look for butter with around 82-85% butterfat for the most tender, flaky crust possible.
Sweet Cherry Hand Pies Recipe
- Total Time: 1 hour 40-45 minutes
- Yield: 8 1x
Description
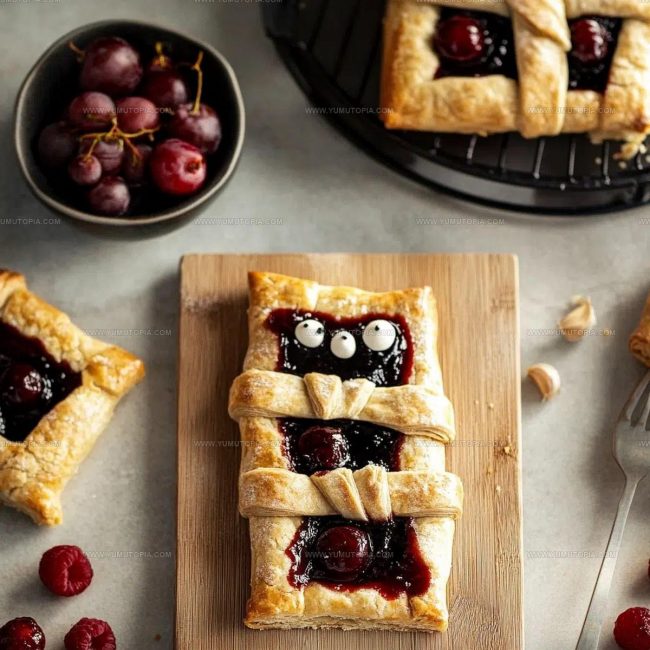
Delicate Cherry Hand Pies bring the sweetness of summer right to your plate with flaky, golden pastry hugging juicy cherries inside. Baked until perfectly golden and ready to enjoy with coffee or as a quick dessert, these little treats make sharing easy and delicious.
Ingredients
Main Ingredients:
- 2.5 cups all-purpose flour (300 g)
- 2 cups fresh or frozen cherries, pitted
- 1 cup cold unsalted butter (225 g)
Supporting Ingredients:
- 0.5 cup granulated sugar (100 g)
- 6–8 tablespoons ice water
- 2 tablespoons cornstarch
- 1 tablespoon granulated sugar
- 1 tablespoon lemon juice
- 1 teaspoon vanilla extract
- 1 teaspoon salt
Finishing Ingredients:
- 1 egg, beaten
- 1 tablespoon coarse sugar
Instructions
- Gather 2 ½ cups (300 g) all-purpose flour, 1 teaspoon salt, 1 tablespoon granulated sugar in a mixing bowl. Combine the dry ingredients thoroughly.
- Cut 1 cup (225 g) cold unsalted butter into small cubes. Work butter into flour mixture using a pastry cutter or fingertips until the texture resembles coarse crumbs.
- Drizzle 6-8 tablespoons of ice water into the mixture. Gently knead until the dough just comes together. Avoid overworking the dough.
- Divide the dough into two equal portions. Shape each into a flat disc. Wrap tightly in plastic wrap and refrigerate for 60 minutes.
- Pit 2 cups of fresh or frozen cherries. Combine cherries with ½ cup (100 g) granulated sugar, 2 tablespoons cornstarch, and 1 tablespoon lemon juice in a saucepan.
- Cook cherry mixture over medium heat for 5-7 minutes, stirring constantly until the mixture thickens and becomes glossy. Remove from heat.
- Stir 1 teaspoon vanilla extract into the cooled cherry filling. Let the mixture rest and come to room temperature.
- Dust your work surface with flour. Roll out each dough disc to 1/8-inch thickness. Use a 4-inch round cutter to create circular pastry bases.
- Place 1 ½ tablespoons of cherry filling in the center of each pastry circle. Leave a small border around the edges.
- Fold the dough over to create half-moon shapes. Press edges firmly with a fork to seal completely.
- Whisk 1 egg and brush the surface of each hand pie. Sprinkle with 1 tablespoon coarse sugar if desired.
- Preheat oven to 375°F (190°C). Line a baking sheet with parchment paper.
- Arrange hand pies on the prepared baking sheet, spacing them 1 inch apart. Bake for 20-25 minutes until golden brown and crisp.
- Remove from oven and let cool on the baking sheet for 10 minutes. Transfer to a wire rack to cool completely before serving.
Notes
- Chill your dough thoroughly to ensure a flaky, tender crust that separates into delicate layers when baked.
- Use fresh, ripe cherries for the most vibrant flavor, but frozen cherries work well when fresh aren’t available.
- Prevent soggy bottoms by placing the hand pies on a preheated baking sheet and ensuring the filling isn’t too watery.
- For dietary adaptations, swap wheat flour with gluten-free blend, and use plant-based butter for a vegan version of these delightful hand pies.
- Prep Time: 1 hour 20 minutes
- Cook Time: 20-25 minutes
- Category: Pies
- Method: Baking
- Cuisine: American
Nutrition
- Serving Size: 8
- Calories: 297 kcal
- Sugar: 15 g
- Sodium: 75 mg
- Fat: 14 g
- Saturated Fat: 8 g
- Unsaturated Fat: 6 g
- Trans Fat: 0.2 g
- Carbohydrates: 39 g
- Fiber: 2 g
- Protein: 3 g
- Cholesterol: 28 mg
Logan Lemaster
Founder & Culinary Innovator
Expertise
Recipe Development and Innovation, Menu Design and Optimization, Fine Dining Techniques, Ingredient Pairing and Flavor Science
Education
Metropolitan Culinary Arts Institute
Logan’s culinary journey kicked off in his vibrant Chicago family kitchen, where fresh, seasonal ingredients and bold flavors were always front and center.
After graduating from the Metropolitan Culinary Arts Institute in Arlington, Virginia, and honing his skills in renowned restaurants, Logan mastered the art of blending classic techniques with exciting, modern twists.
His kitchen is a dynamic lab for flavor exploration. Through Yum Utopia, Logan aims to empower you to cook with both confidence and creativity, turning simple ingredients into spectacular meals.