
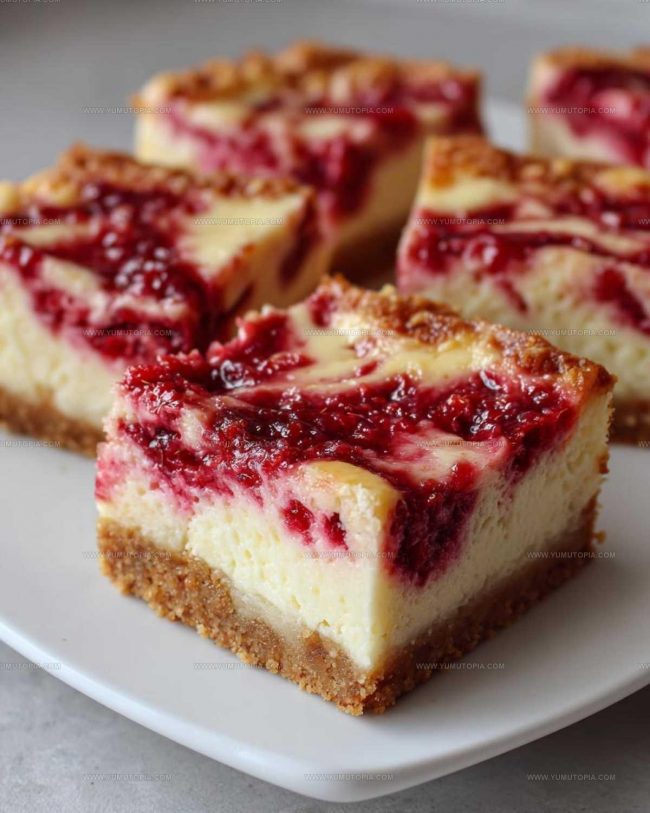
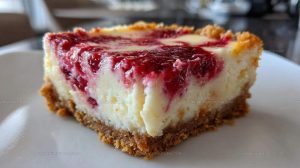
Lush Raspberry Cheesecake Bars Recipe to Indulge In
Tangy Raspberry Cheesecake Bars bring pure happiness to any gathering where people crave something sweet and memorable.
These bars have become a favorite at potlucks and weekend celebrations because they look impressive yet feel approachable.
The contrast between creamy and fruity creates a dessert that satisfies without overwhelming anyone at the table.
Each bite offers that perfect balance people search for when they want comfort food with a special touch.
Whether you need something for a celebration or just want to treat yourself on a quiet afternoon, this dessert delivers every single time.
Friends always ask for seconds, and honestly, who can blame them?
The best part is how simple everything comes together when you follow along step by step.
So go ahead and make a batch that everyone will remember.
Reasons These Raspberry Cheesecake Bars Feel So Indulgent
Core Ingredients Of Raspberry Cheesecake Bars
Crust Ingredients:Cheesecake Filling Ingredients:Raspberry Swirl Ingredients:Essential Tools for Raspberry Cheesecake Bars
Complete Guide to Raspberry Cheesecake Bars
Prepare Oven and Pan
Heat the oven to 350°F (175°C). Grab an 8×8 inch baking pan and line it with parchment paper, making sure some paper hangs over the sides for easy removal later.
Mix Crust Ingredients
Grab a medium bowl and whisk together:
Your cold butter needs to be cubed and ready to blend.
Create Crust Texture
Use your fingertips or a pastry blender to work the cold butter into the dry ingredients. Keep working until the mixture looks like rough, coarse crumbs that could almost hold together.
Form Crust Base
Press the crumbly mixture firmly and evenly into the bottom of your prepared pan. Smooth it out with gentle, even pressure to create a solid base.
Bake Initial Crust
Slide the pan into the preheated oven and bake the crust for 15-18 minutes. Watch for a light golden color that signals it’s perfectly done. Remove and let cool slightly.
Cook Raspberry Sauce
Combine 1 cup raspberries and 2 tablespoons sugar in a small saucepan. Cook over medium heat, stirring occasionally until the berries break down and release their juices.
Thicken Raspberry Mixture
Whisk 1 tablespoon cornstarch with a tablespoon of water to create a smooth slurry. Stir this into the raspberry mixture and cook for 1-2 minutes until the sauce thickens.
Prepare Cheesecake Base
Beat 2 packages of softened cream cheese with ¾ cup sugar using an electric mixer. Keep mixing until the texture becomes smooth and creamy with no lumps.
Add Filling Ingredients
Add eggs one at a time, mixing thoroughly after each. Stir in 1 teaspoon vanilla and ¼ cup sour cream. Mix just until combined – don’t overwork the batter.
Layer Cheesecake Filling
Pour the creamy cheesecake mixture over your partially cooled crust. Spread it evenly to create a perfect base for the raspberry swirl.
Create Raspberry Swirl
Drop spoonfuls of cooled raspberry sauce across the cheesecake surface. Use a toothpick or knife to create gentle swirling patterns throughout the filling.
Bake Cheesecake Bars
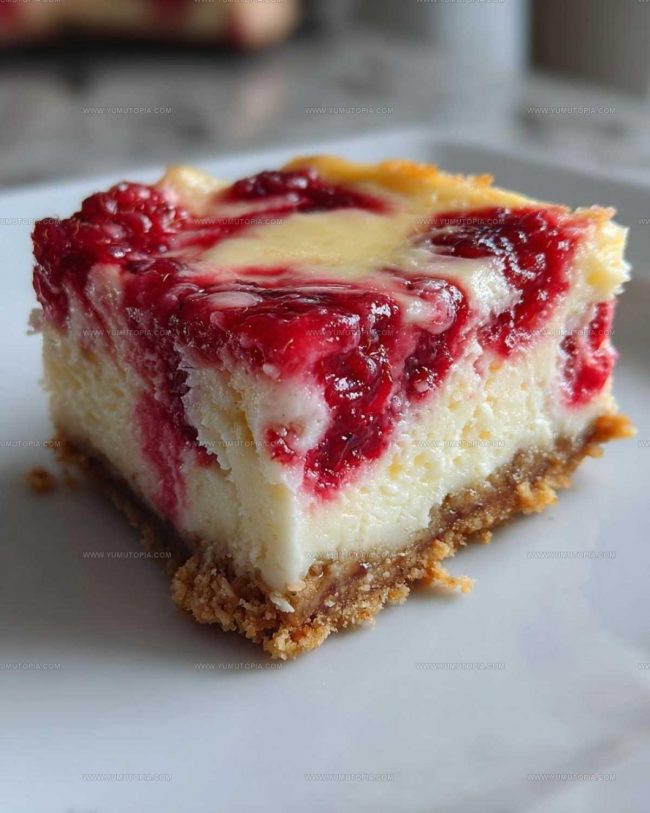
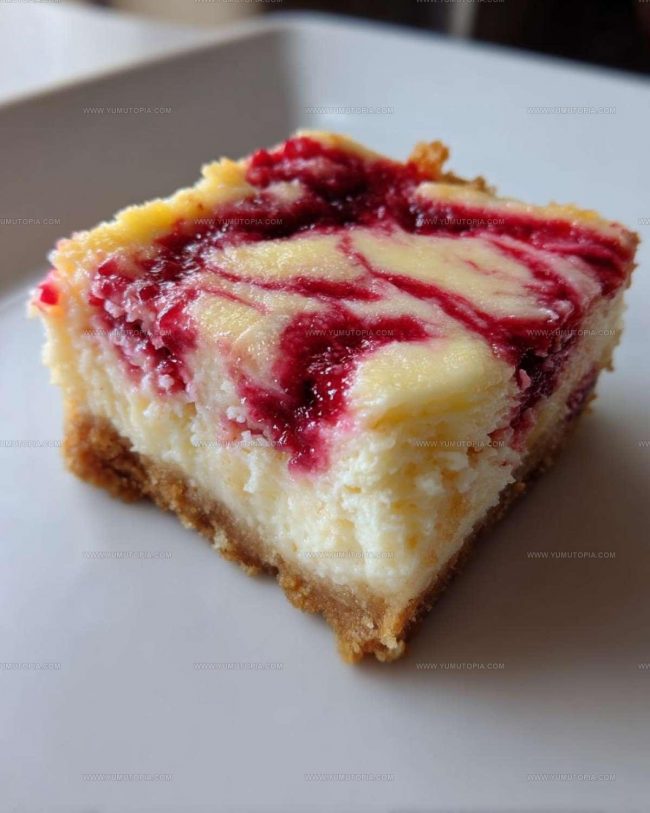
Bake for 30-35 minutes. The edges should look set, with the center having a slight wobble when gently shaken. This ensures a creamy, perfect texture.
Cool and Chill
Let the bars cool completely at room temperature. Refrigerate for 2-3 hours until firm and set. The waiting is the hardest part!
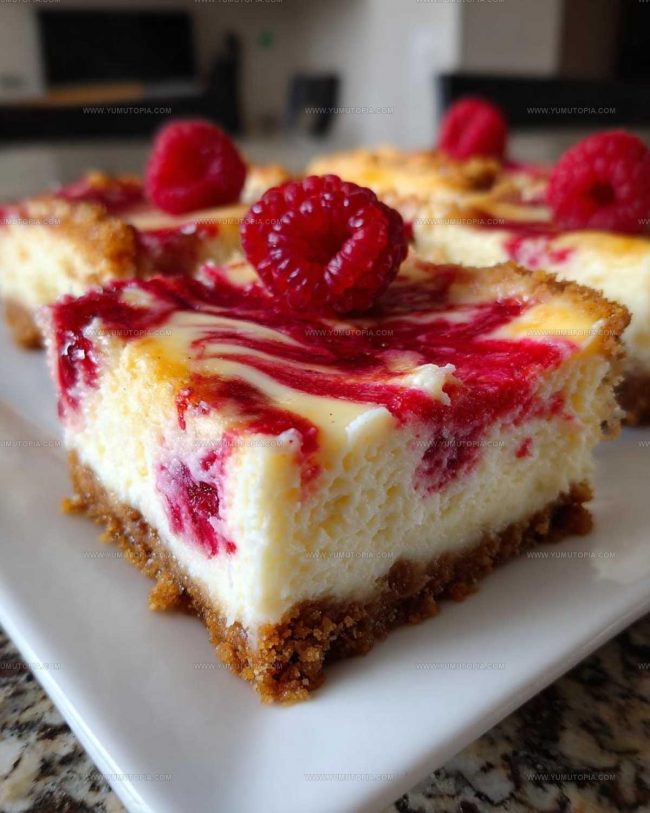
Slice and Serve
Lift the bars out using the parchment paper overhang. Cut into neat squares and get ready to enjoy your raspberry cheesecake creation.
Extra Touches for Creamier Cheesecake
Delightful Adaptations for Raspberry Cheesecake Bars
Ways to Serve Delightful Raspberry Cheesecake Bars
Keeping Bars Smooth and Chilled
Common Queries Regarding Creamy Raspberry Dessert Bars
Can I use frozen raspberries instead of fresh ones?
Frozen raspberries work perfectly! Just thaw and drain them before cooking down with sugar to create the swirl.
How do raspberries mix into the cheesecake without making it soggy?
The cornstarch slurry helps thicken the raspberry mixture, preventing excess moisture from ruining your bars.
What if my cream cheese isn’t completely soft?
Make sure cream cheese sits at room temperature for about 30 minutes before mixing to ensure a smooth, lump-free filling.
Why should cheesecake filling not be overmixed?
Overmixing incorporates too much air, which can cause cracks and a dense texture in your bars.
Can this recipe be made gluten-free?
Substitute the all-purpose flour with a gluten-free flour blend to make these bars suitable for those avoiding gluten.
How ripe should raspberries be for this recipe?
Choose bright, firm raspberries without soft spots for the best flavor and texture in your swirl.
Tangy Raspberry Cheesecake Bars Recipe
- Total Time: 3 hours 45 minutes – 4 hours 23 minutes
- Yield: 9 1x
Description
Raspberry Cheesecake Bars bring pure summer bliss right to your kitchen counter, melting together tangy cream cheese and sweet raspberries in a crumbly graham cracker crust that makes dessert dreams come true. Prepare these simple bars when friends visit, and watch them disappear faster than you can slice them into perfect squares.
Ingredients
Main Ingredients:
- 2 (8 ounces) cream cheese
- 1 ½ cups all-purpose flour
- 1 cup raspberries
Supporting Ingredients:
- 1 ¼ cups granulated sugar
- ½ cup unsalted butter
- 2 large eggs
Complementary Ingredients:
- ¼ cup sour cream
- 1 tablespoon cornstarch
- 1 teaspoon vanilla extract
- ¼ teaspoon salt
Instructions
- Warm your oven to 350°F (175°C). Prepare an 8×8 inch pan by lining it with parchment paper, ensuring side overhangs for easy removal.
- Mix 1 ½ cups flour, ½ cup sugar, and ¼ teaspoon salt in a medium bowl. Incorporate ½ cup cold, cubed butter using your fingertips until the mixture looks like coarse crumbs.
- Press the crust firmly into the pan’s bottom. Bake 15-18 minutes until golden, then set aside to cool slightly.
- Create the raspberry sauce by combining 1 cup raspberries with 2 tablespoons sugar in a small saucepan. Cook over medium heat, crushing berries as they soften.
- Whisk 1 tablespoon cornstarch with 1 tablespoon water to create a slurry. Stir into the raspberry mixture and cook 1-2 minutes until thickened, then remove from heat.
- Beat 16 ounces (2 packages) softened cream cheese with ¾ cup sugar using an electric mixer until completely smooth.
- Add 2 eggs one at a time, mixing thoroughly after each. Fold in 1 teaspoon vanilla and ¼ cup sour cream, blending gently without overmixing.
- Pour the creamy cheesecake mixture over the cooled crust, spreading evenly.
- Dot spoonfuls of raspberry sauce across the surface. Use a toothpick to create elegant swirls through the filling.
- Bake 30-35 minutes until edges are set and center slightly jiggles when nudged.
- Allow bars to cool completely at room temperature, then refrigerate 2-3 hours until firm.
- Lift the entire dessert out using parchment paper sides. Slice into neat squares for serving.
Notes
- Use room temperature cream cheese for the smoothest, creamiest filling that blends without lumps.
- Ensure your raspberries are ripe and sweet for the most vibrant swirl and natural flavor.
- Cool the raspberry mixture completely before adding to prevent accidentally cooking the cheesecake filling.
- Line the pan with parchment paper for easy removal and clean slicing of your bars.
- Prep Time: 25-30 minutes
- Cook Time: 45-53 minutes
- Category: Dessert Bars
- Method: Baking
- Cuisine: American
Nutrition
- Serving Size: 9
- Calories: 265 kcal
- Sugar: 20 g
- Sodium: 115 mg
- Fat: 18 g
- Saturated Fat: 11 g
- Unsaturated Fat: 7 g
- Trans Fat: 0.3 g
- Carbohydrates: 20 g
- Fiber: 1 g
- Protein: 5 g
- Cholesterol: 55 mg
Madison Wyman
Recipe Developer & Food Storyteller
Expertise
Recipe Research and Adaptation, Food Writing and Cultural Storytelling, Sustainable and Ethical Sourcing, Dietary Adaptations (e.g., gluten-free, plant-based)
Education
Oregon Health & Science University
Portland Community College
Madison’s passion for flavor and culture ignited amidst the rich Southern cooking traditions of her upbringing, where cherished family recipes told delicious tales.
Armed with a Master’s in Food Systems and Society from Oregon Health & Science University and a Culinary Arts Certificate from Portland Community College, Madison truly excels at transforming rich, intricate flavors into dishes that are both approachable and heartfelt.
For her, cooking is a vibrant blend of science, art, and heritage – a powerful way to connect us to our roots and each other. Her recipes invite you to delve deeper, uncovering the fascinating stories woven into every ingredient.