
Russian Honey Cake Recipe with Sweet Golden Layers
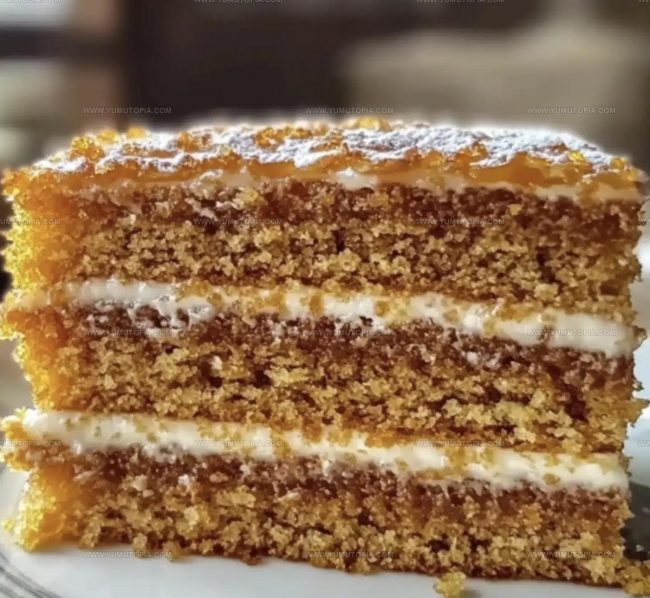
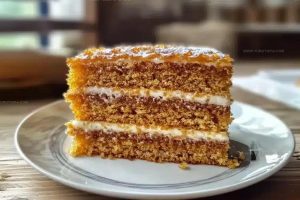
Russian Honey Cake (Medovik) has earned its reputation as one of the most beloved desserts across Eastern Europe for generations.
Layers of delicate cake paired with luscious cream create an unforgettable eating experience that feels both elegant and comforting.
The dessert carries a rich history dating back to imperial times, when it was said to have won over even those who claimed to dislike honey.
Every bite provides a perfect balance of sweetness and subtle complexity that makes it ideal for celebrations or quiet afternoon tea.
Making this showstopping dessert at home is more approachable than you might think, and the results are absolutely worth the effort.
Once you taste the way those tender layers meld together after chilling, it becomes clear why this cake has remained a treasured tradition.
Secrets Behind The Legendary Flavor Of This Russian Honey Cake
Secrets To The Layered Traditional Magic Of Russian Honey Cake
Tools That Shape Thin Honey Cake Layers
Steps Refining Classic Medovik Flavor
Create the Honey Base
Grab a cozy saucepan and set it over medium heat at 350°F (175°C). In the pan, combine:
Stir the mixture slowly as it transforms into a golden, aromatic blend. Once everything melts smoothly, take the pan off the heat and let it cool for a moment. Whisk in 2 large eggs one at a time until the mixture looks glossy and thick.
Prepare the Dough
Sprinkle 1 teaspoon baking soda into 2½ cups all-purpose flour (300g). Gradually add the flour mixture to your honey base, stirring gently. Work the ingredients until you have a soft, sticky dough that feels like rich cookie dough. The texture should be smooth and pliable.
Divide and Roll Layers
Split the dough into 8 equal portions. On parchment paper, roll each portion into a thin circle about 9 inches in diameter. Use a cake ring or springform pan bottom as your guide to create perfect circles.
Bake the Cake Layers
Keep your oven at 350°F (175°C). Bake each layer separately for 5-7 minutes until they turn a gorgeous golden brown. Let the layers cool completely. They’ll start crisp but will soften beautifully later.
Whip the Creamy Frosting
Prepare the frosting with these ingredients:
Whip the heavy cream until soft peaks form. In a separate bowl, blend the sour cream and powdered sugar. Gently fold these two mixtures together until you have a light, velvety cream.
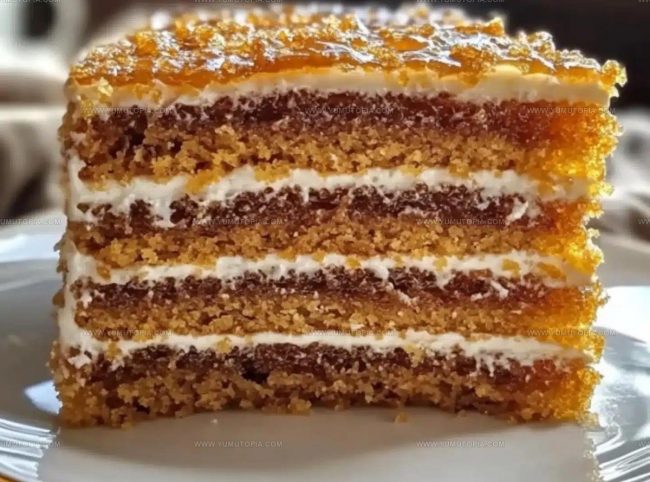
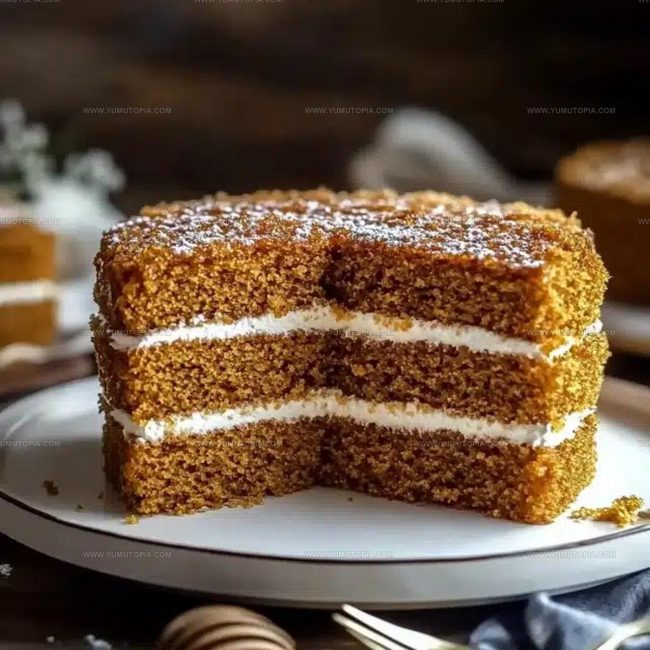
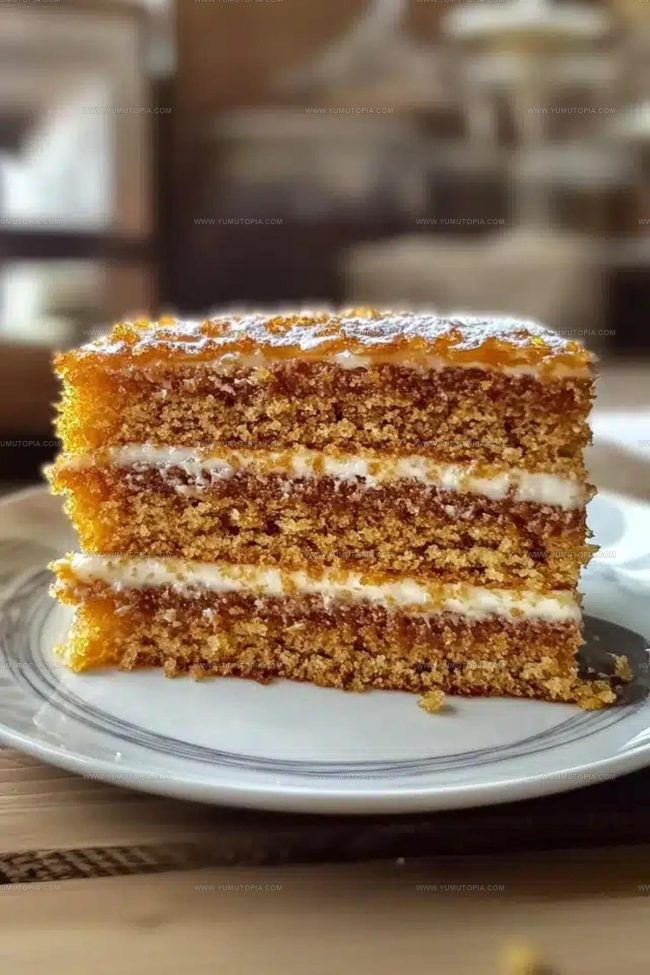
Assemble the Cake
Start layering your cake: alternate between a cake layer and frosting. Spread the cream generously, covering each layer completely and reaching all the way to the edges. Your final layer should be a smooth coating of frosting on top and sides.
Chill and Soften
Cover the assembled cake and refrigerate for at least 6 hours, preferably overnight. This resting time allows the frosting to soak into the layers, creating a wonderfully soft and delicious Russian Honey Cake.
New Visions For This Layered Honey Dessert
Traditional Honey Cream And Layer Variations For Medovik
Plating And Presentation Of Traditional Russian Medovik
Allowing Russian Honey Cake to Age and Store Properly
Multi-Layer Cake FAQ: Assembly & Softening Tips
What makes Russian Honey Cake different from other cakes?
Russian Honey Cake stands out with its unique layered texture. Each delicate layer gets soft and tender when soaked in creamy frosting, creating a melt-in-your-mouth experience that’s totally different from traditional dense cakes.
Can I substitute honey in this recipe?
Honey is crucial to the authentic flavor. Swapping it out will change the cake’s entire character. If you absolutely must, use a similar dark liquid sweetener like maple syrup, but the taste won’t be quite the same.
Do I need special equipment to make this cake?
A cake ring or springform pan bottom helps create perfect circular layers, but a sharp knife and steady hand work just as well. A rolling pin and parchment paper are your best friends for creating thin, even layers.
Why does the cake need to sit overnight?
Resting allows the frosting to penetrate the crisp layers, transforming them from crunchy to beautifully soft. This magical transformation is what gives Russian Honey Cake its signature texture.
Is this cake challenging for beginners?
While it requires patience and several steps, anyone comfortable in the kitchen can master this recipe. The process is straightforward – just take your time and follow each step carefully.
Traditional Russian Honey Cake (Medovik) Recipe
- Total Time: 6 hours 45 minutes to overnight
- Yield: 8 1x
Description
Russian Honey Cake (Medovik) brings generations of family memories right to your kitchen table. Delicate layers of honey-infused cake melt together with creamy sour cream frosting, creating a dessert that whispers stories of Russian home cooking and warm afternoons.
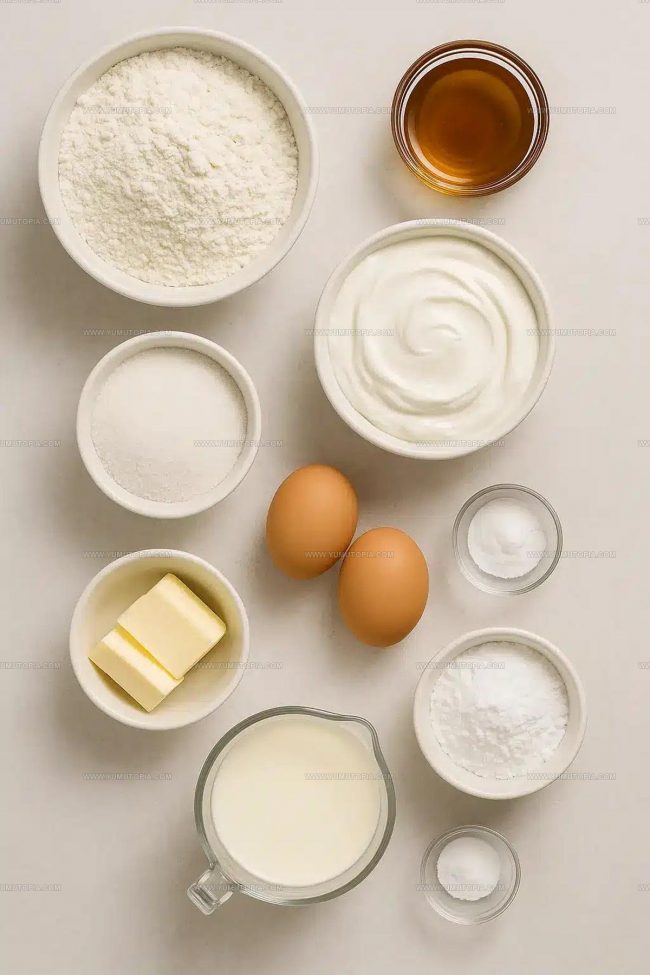
Ingredients
Main Ingredients:
- 2½ cups all-purpose flour
- 2 large eggs
- ½ cup honey
- ¾ cup granulated sugar
- 2 cups sour cream
- 1 cup heavy whipping cream
Supporting Ingredients:
- ½ cup unsalted butter
- 1 teaspoon baking soda
Finishing Ingredients:
- ½ cup powdered sugar
Instructions
- Craft a golden honey mixture by melting ½ cup unsalted butter, ½ cup honey, and ¾ cup granulated sugar in a saucepan over medium heat for 3-4 minutes until smooth and fragrant.
- Remove the honey base from heat and whisk in 2 large eggs one at a time until the mixture becomes glossy and well-incorporated.
- Stir 1 teaspoon baking soda into 2½ cups all-purpose flour, then gradually fold into the honey mixture until a soft, pliable dough forms.
- Divide the dough into 8 equal portions and roll each piece into a thin 9-inch circle on parchment paper using a cake ring as a guide.
- Heat your oven to 350°F (175°C) and bake each layer separately for 5-7 minutes until golden brown and crisp.
- Allow cake layers to cool completely on a wire rack, which helps them set and become more manageable.
- Whip 1 cup heavy whipping cream until soft peaks develop at medium-high speed for about 3 minutes.
- In a separate bowl, blend 2 cups sour cream with ½ cup powdered sugar until smooth and creamy.
- Gently fold the whipped cream into the sour cream mixture to create a light, airy frosting.
- Assemble the cake by layering a cake disc with frosting, repeating until all layers are used and fully covered.
- Spread remaining frosting over the top and sides of the cake, creating an even coating.
- Refrigerate the assembled cake for 6-8 hours or overnight to allow layers to soften and flavors to meld.
Notes
- Chill the dough before rolling to make it easier to handle and prevent sticking.
- Use a sharp knife or pizza cutter to get clean, even cake layers when cutting the rolled-out dough.
- For a smoother cream, ensure cream cheese and butter are at room temperature before mixing.
- Letting the assembled cake rest overnight in the refrigerator helps the layers soften and develop a more complex flavor, making the texture wonderfully tender.
- Prep Time: 45 minutes
- Cook Time: 40-56 minutes
- Category: Cakes
- Method: Baking
- Cuisine: Russian
Nutrition
- Serving Size: 8
- Calories: 420 kcal
- Sugar: 30 g
- Sodium: 180 mg
- Fat: 25 g
- Saturated Fat: 14 g
- Unsaturated Fat: 10 g
- Trans Fat: 0.5 g
- Carbohydrates: 40 g
- Fiber: 1.5 g
- Protein: 6 g
- Cholesterol: 90 mg
Logan Lemaster
Founder & Culinary Innovator
Expertise
Recipe Development and Innovation, Menu Design and Optimization, Fine Dining Techniques, Ingredient Pairing and Flavor Science
Education
Metropolitan Culinary Arts Institute
Logan’s culinary journey kicked off in his vibrant Chicago family kitchen, where fresh, seasonal ingredients and bold flavors were always front and center.
After graduating from the Metropolitan Culinary Arts Institute in Arlington, Virginia, and honing his skills in renowned restaurants, Logan mastered the art of blending classic techniques with exciting, modern twists.
His kitchen is a dynamic lab for flavor exploration. Through Yum Utopia, Logan aims to empower you to cook with both confidence and creativity, turning simple ingredients into spectacular meals.