
Melt In Your Mouth Snowball Cookies Recipe To Bake
Snowball Cookies are delicate, melt-in-your-mouth treats that have become a beloved staple at celebrations and cozy gatherings throughout the year.
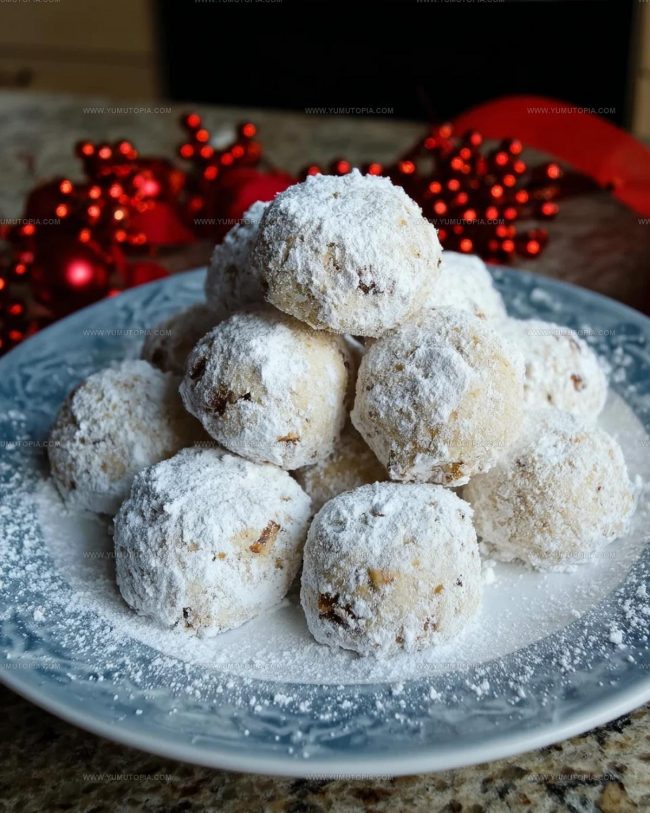
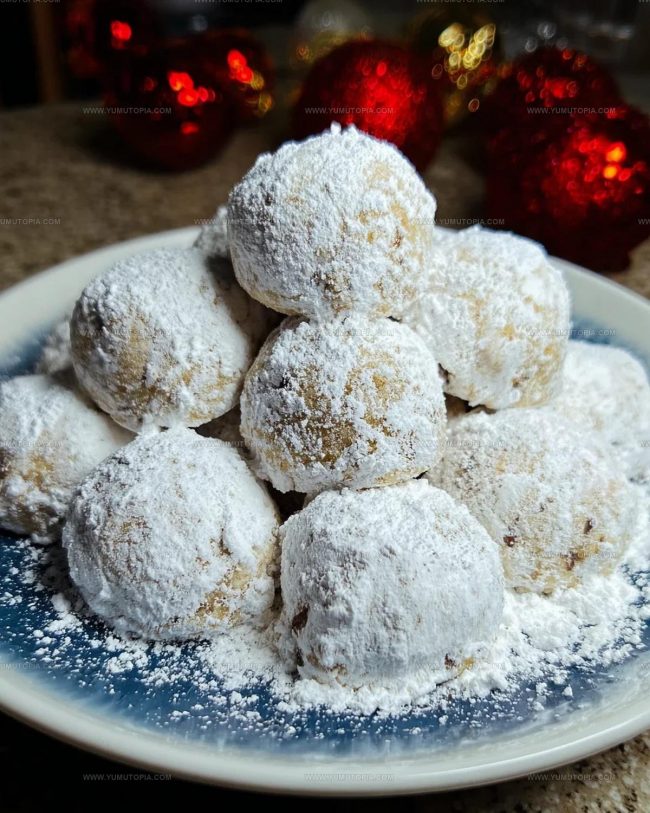
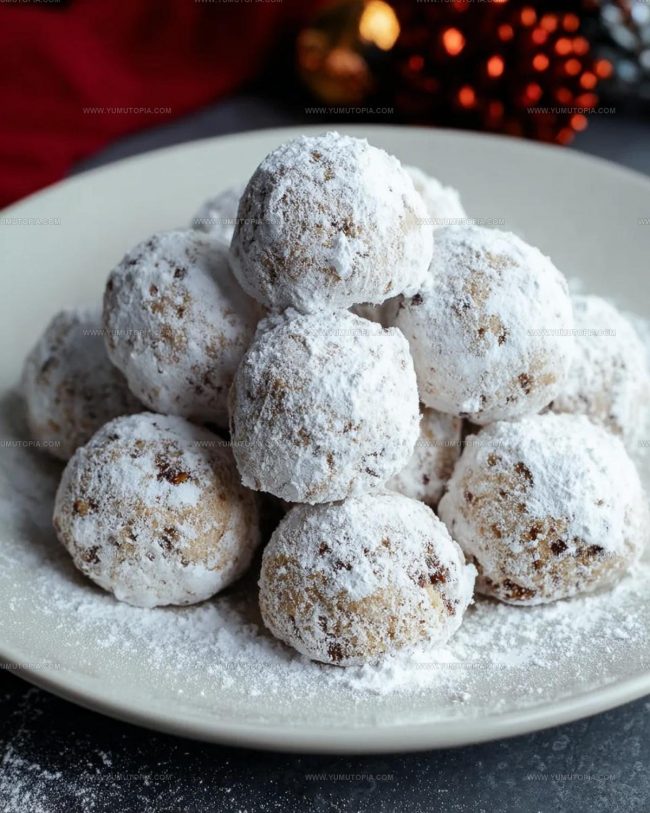
Soft, buttery rounds covered in snowy white powder create an elegant presentation that feels special without requiring advanced baking skills.
The beauty of making them lies in how forgiving the dough is and how quickly a full batch comes together in one bowl.
When you bite into one, it practically dissolves on contact, leaving behind a rich, nutty sweetness that pairs beautifully with coffee or tea.
They store exceptionally well in tins, making them ideal for gifting or keeping on hand when unexpected company drops by.
The simplicity and charm of homemade cookies like this remind us why some classics never go out of style, no matter how many modern desserts appear on the scene.
Click below to see exactly how to make a batch that will disappear before you know it.
Highlights of Snowball Cookies
Snowball Cookies Ingredient Overview
Butter or Oil Base:Flour Options:Sugar Components:Nut Selection:Optional Coating:Necessary Tools for Snowball Cookies
Snowball Cookies Baking Instructions
Prep the Oven
Crank up your oven to a steady 325°F. Grab a baking sheet and line it with parchment paper so these little treats won’t stick.
Cream the Base
Grab your mixer and whip together 1 cup butter and 1/2 cup powdered sugar until the mixture looks light and fluffy. This takes about 2-3 minutes of mixing.
Prepare Dry Ingredients
In a separate bowl, blend your dry ingredients carefully:
The combination will look like a delicate, nutty powder.
Combine Mixtures
Slowly fold the dry ingredients into your creamy butter mixture. Mix until everything comes together into a soft dough that holds its shape when you press it.
Form Cookie Balls
Roll the dough into small, bite-sized balls about 1 inch across. Place each ball about 1.5 inches apart on your prepared baking sheet.
First Bake
Slide the sheet into the 325°F oven and bake for exactly 22 minutes. Watch for the edges to turn a soft golden color.
Sugar Coating
While the cookies are still warm, roll each one generously in 1/2 cup additional powdered sugar. The warm cookie helps the sugar stick perfectly.
Cool and Serve
Transfer the sugar-coated cookies to a wire rack. Let them cool completely for about 30 minutes before serving.
Best Tips For Snowball Cookies
Snowball Cookie Variations from Classic to Creative
Classic Ways to Serve Snowball Cookies
Smart Storage Tips for Snowball Cookies
Snowball Cookies Questions Answered
What nuts work best in snowball cookies?
Pecans and walnuts are classic choices that add wonderful flavor and crunch. Chopped almonds also create delicious results.
Can snowball cookies be made ahead of time?
Absolutely – prepare the dough and refrigerate up to two days before baking. You can also freeze unbaked cookie balls for future baking.
How do I keep the powdered sugar from falling off?
Coat the cookies when they are still warm but not hot. The residual heat helps the sugar stick better to your cookies.
Are these cookies delicate to handle?
They’re somewhat fragile when first baked, so gently roll them in sugar and let them cool completely before moving around.
Can snowball cookies be frozen after baking?
Yes! Freeze them in a single layer, then transfer to a sealed container. They’ll stay fresh for about three weeks.
Do these cookies contain eggs?
This specific recipe does not require eggs, making them simpler to prepare and great for basic baking skills.

Walnut Rich Snowball Cookies Recipe
- Total Time: 35-40 minutes
- Yield: 12 1x
Description
Snowball cookies deliver pure holiday happiness right from your kitchen, melting with buttery pecan goodness that makes festive gatherings extra special. Powdered sugar coating creates that classic winter wonderland look your family and friends absolutely adore.
Ingredients
Main Ingredients:
- 1 cup butter or coconut oil
- 2 cups flour
- ½ cup powdered sugar
Supporting Ingredients:
- ½ cup finely chopped walnuts
Finishing/Coating Ingredients:
- Optional: Additional powdered sugar or cocoa powder for rolling
Instructions
- Warm your oven precisely to 325°F and line a baking sheet with parchment paper.
- Grab a mixer and combine 1 cup softened butter with ½ cup powdered sugar, whipping until the mixture becomes silky and light.
- Measure out 2 cups flour and ½ cup finely chopped nuts, whisking them together in a separate mixing bowl.
- Slowly fold the dry ingredients into your butter mixture, stirring gently until a consistent dough emerges.
- Roll the dough into small 1-inch spheres, placing each one about 2 inches apart on the prepared baking sheet.
- Slide the cookie sheet into the 325°F oven and bake for exactly 20-25 minutes, watching for gentle golden edges.
- Remove the cookies from the oven and let them rest for 3-4 minutes while they’re still warm.
- Generously coat each cookie by rolling them in ¼ cup additional powdered sugar, ensuring complete coverage.
- Allow the cookies to cool completely on a wire rack for about 30 minutes before serving or storing.
Notes
- Use room temperature butter for smoother mixing and better cookie texture.
- Chop nuts finely to distribute them evenly throughout the dough and prevent large chunks.
- For gluten-free version, swap regular flour with almond or gluten-free all-purpose flour blend.
- Roll cookies in powdered sugar twice for a thicker, more dramatic coating that looks like real snowballs.
- Prep Time: 15 minutes
- Cook Time: 20-25 minutes
- Category: Cookies
- Method: Baking
- Cuisine: American
Nutrition
- Serving Size: 12
- Calories: 171
- Sugar: 5 g
- Sodium: 1 mg
- Fat: 14 g
- Saturated Fat: 7 g
- Unsaturated Fat: 6 g
- Trans Fat: 0 g
- Carbohydrates: 12 g
- Fiber: 1 g
- Protein: 2 g
- Cholesterol: 30 mg
Madison Wyman
Recipe Developer & Food Storyteller
Expertise
Recipe Research and Adaptation, Food Writing and Cultural Storytelling, Sustainable and Ethical Sourcing, Dietary Adaptations (e.g., gluten-free, plant-based)
Education
Oregon Health & Science University
Portland Community College
Madison’s passion for flavor and culture ignited amidst the rich Southern cooking traditions of her upbringing, where cherished family recipes told delicious tales.
Armed with a Master’s in Food Systems and Society from Oregon Health & Science University and a Culinary Arts Certificate from Portland Community College, Madison truly excels at transforming rich, intricate flavors into dishes that are both approachable and heartfelt.
For her, cooking is a vibrant blend of science, art, and heritage – a powerful way to connect us to our roots and each other. Her recipes invite you to delve deeper, uncovering the fascinating stories woven into every ingredient.