
White Chocolate Peppermint Cookies Recipe For Winter
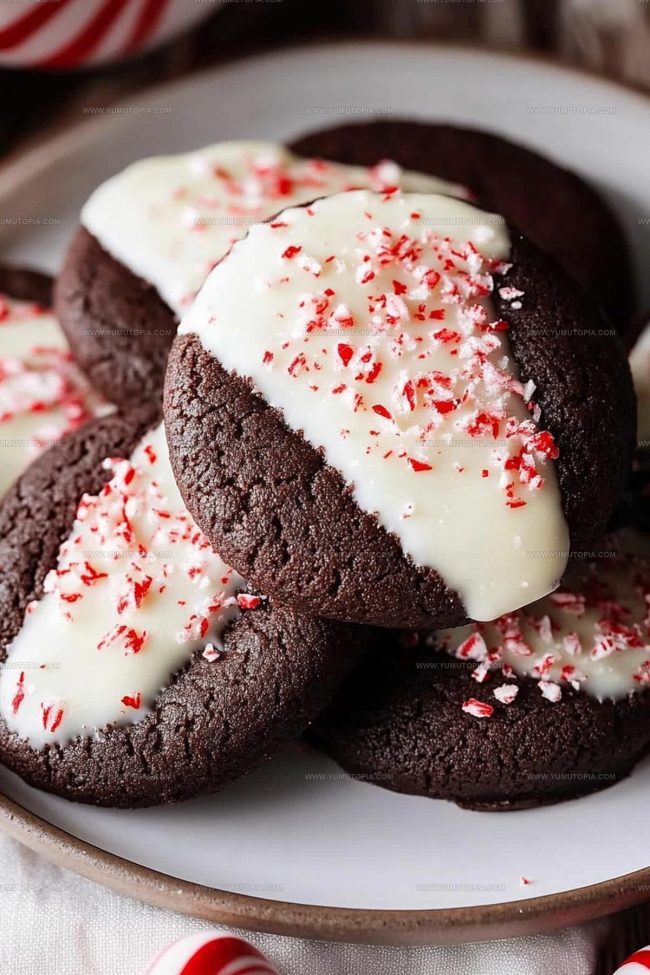
White chocolate dipped peppermint cookies deliver a festive treat that brightens any winter gathering or cozy afternoon at home.
The combination creates a delightful contrast of creamy sweetness and cool mint flavor in every bite.
These cookies appeal to anyone who loves seasonal desserts with a cheerful, celebratory spirit.
Perfect for cookie exchanges, holiday parties, or simply enjoying with hot cocoa by the fireplace, they bring joy to every occasion.
The contrast of colors makes them visually stunning on dessert tables too.
Simple enough for beginners yet impressive enough to share with guests, they strike the ideal balance between ease and elegance.
Why White Chocolate Peppermint Cookies Shine
What Goes Into Peppermint Chocolate Cookies
Cookie Base Ingredients:Flavor Enhancers:Dry Ingredients:Decorative Elements:Peppermint Cookie Prep: What Makes It Easy
Directions for White Chocolate Peppermint Cookies

Preheat and Prep
Set your oven to 350°F (175°C). Grab a couple of baking sheets and line them with parchment paper. This helps keep those cookies from sticking and makes cleanup super easy.
Cream the Butter and Sugars
Grab a large mixing bowl and toss in 1 cup (227g) unsalted butter at room temperature, 1 cup (200g) granulated sugar, and 1 cup (220g) packed brown sugar. Beat these together until the mixture looks light and fluffy. Your arm might get a little tired, but keep mixing!
Add Wet Ingredients
Crack in 2 large eggs, then pour 1 teaspoon vanilla extract and 1 teaspoon peppermint extract into the bowl. Mix until everything is well combined and smooth.
Mix Dry Ingredients
In a separate bowl, whisk together 2 3/4 cups (344g) all-purpose flour, 3/4 cup (75g) cocoa powder, 1 teaspoon baking soda, and 1/2 teaspoon salt. This is your dry ingredient team that’ll give the cookies their perfect texture.
Combine Wet and Dry
Slowly add the dry ingredients to your butter mixture. Stir gently until everything just comes together. Don’t go crazy with mixing – we want tender cookies!
Shape the Cookies
Use a tablespoon to scoop out dough balls onto your prepared baking sheets. Leave some space between each cookie. Gently press down on each ball to flatten it just a bit.
Bake to Perfection
Slide the baking sheets into the 350°F (175°C) oven. Bake for 8-10 minutes until the edges look set. The centers might seem a tiny bit soft – that’s exactly what we want!
Cool Down
Take the cookies out and let them cool completely on the baking sheets. Patience is key here – hot cookies fall apart easily.
Melt the Chocolate
Grab 12 ounces (340g) of white chocolate chips. Melt them in the microwave, stopping every 30 seconds to stir. Keep going until the chocolate is smooth and glossy.
Dip and Decorate
Dunk half of each cookie into the melted white chocolate. Lay them on fresh parchment paper. Before the chocolate sets:
Sprinkle those crushed candies over the chocolate-dipped part of each cookie.
Let Set and Serve
Give the chocolate about 30 minutes to harden completely. Store the cookies in an airtight container – they’ll stay fresh for up to 5 days, if they last that long!
Dipping Tips for White Chocolate Coating
Flavor Spins for Peppermint Cookies
How Peppermint Cookies Are Served
Storing Chocolate-Dipped Cookies
Peppermint Cookie Questions Home Bakers Ask
Can I use dark chocolate instead of white chocolate?
Sure! Dark chocolate works perfectly and gives the cookies a rich, decadent flavor that complements the peppermint.
How finely should I crush the peppermint candies?
Aim for small, uneven pieces. You want a mix of fine powder and tiny chunks to create a nice texture and visual appeal on the cookies.
Do I need a stand mixer for this recipe?
Nope! A hand mixer or even a wooden spoon and some arm strength will help you cream the butter and sugar perfectly.
Are these cookies good for holiday gifting?
Absolutely! These cookies pack beautifully and look super festive with the white chocolate and peppermint sprinkles.
Can I make the dough ahead of time?
Yes, you can prepare the dough and refrigerate it for up to 3 days before baking. Just let the dough soften slightly before scooping and baking.
What if I don’t have peppermint extract?
No worries. The recipe will still taste great, though the peppermint flavor will be more subtle.

White Chocolate Peppermint Cookies Recipe
- Total Time: 23-25 minutes
- Yield: 24 1x
Description
White chocolate peppermint cookies bring festive cheer right to your holiday table. Crisp candy cane edges and smooth white chocolate coating make these treats a guaranteed crowd-pleaser for family gatherings.
Ingredients
Main Ingredients:
- 1 cup unsalted butter
- 1 cup granulated sugar
- 1 cup brown sugar
- 2 large eggs
- 2 ¾ cups all-purpose flour
- ¾ cup cocoa powder
Supporting Ingredients:
- 1 teaspoon vanilla extract
- 1 teaspoon peppermint extract
- 1 teaspoon baking soda
- ½ teaspoon salt
Finishing Ingredients:
- 12 ounces (340 grams) white chocolate chips
- ½ cup crushed peppermint candies or candy canes
Instructions
- Cream 1 cup softened unsalted butter with 1 cup granulated sugar and 1 cup brown sugar at medium speed until your mixture becomes pale and airy, about 3 minutes.
- Blend 2 large eggs into the butter mixture, then stir in 1 teaspoon vanilla extract and 1 teaspoon peppermint extract until completely incorporated.
- Sift 2 ¾ cups all-purpose flour, ¾ cup cocoa powder, 1 teaspoon baking soda, and ½ teaspoon salt into a separate bowl.
- Fold dry ingredients into wet ingredients, stirring gently until your dough forms a consistent dark chocolate color with no white flour streaks.
- Chill the dough in your refrigerator for 30 minutes to help cookies maintain shape during baking.
- Preheat oven to 350°F (175°C) and line two baking sheets with parchment paper.
- Roll dough into 1-tablespoon portions and place 2 inches apart on prepared baking sheets.
- Bake cookies for 9 minutes at 350°F until edges look slightly crisp but centers remain soft.
- Transfer cookies to a wire rack and allow them to cool completely for 45 minutes.
- Melt 12 ounces white chocolate chips in microwave, stirring every 30 seconds until smooth and glossy.
- Dip half of each cookie into melted white chocolate, allowing excess to drip off.
- Sprinkle ½ cup crushed peppermint candies over chocolate-dipped sections before chocolate hardens.
- Let decorated cookies rest at room temperature until chocolate sets completely, approximately 45 minutes.
Notes
- Ensure butter is softened at room temperature for smooth, even mixing of cookie dough.
- Crush peppermint candies finely for a more delicate topping that distributes evenly across the white chocolate.
- Cool cookies completely before dipping to prevent chocolate from sliding off or melting.
- For gluten-free version, substitute all-purpose flour with a 1:1 gluten-free baking blend.
- Prep Time: 15 minutes
- Cook Time: 8-10 minutes
- Category: Cookies
- Method: Baking
- Cuisine: American
Nutrition
- Serving Size: 24
- Calories: 271 kcal
- Sugar: 21 g
- Sodium: 114 mg
- Fat: 14 g
- Saturated Fat: 8 g
- Unsaturated Fat: 5 g
- Trans Fat: 0.3 g
- Carbohydrates: 34 g
- Fiber: 1.2 g
- Protein: 2.7 g
- Cholesterol: 32 mg
Madison Wyman
Recipe Developer & Food Storyteller
Expertise
Recipe Research and Adaptation, Food Writing and Cultural Storytelling, Sustainable and Ethical Sourcing, Dietary Adaptations (e.g., gluten-free, plant-based)
Education
Oregon Health & Science University
Portland Community College
Madison’s passion for flavor and culture ignited amidst the rich Southern cooking traditions of her upbringing, where cherished family recipes told delicious tales.
Armed with a Master’s in Food Systems and Society from Oregon Health & Science University and a Culinary Arts Certificate from Portland Community College, Madison truly excels at transforming rich, intricate flavors into dishes that are both approachable and heartfelt.
For her, cooking is a vibrant blend of science, art, and heritage – a powerful way to connect us to our roots and each other. Her recipes invite you to delve deeper, uncovering the fascinating stories woven into every ingredient.