Tangy Key Lime Pie Bars Recipe For Summer Gatherings
Key lime pie bars promise pure sunshine on a plate! Summer desserts rarely capture tropical charm with such delightful ease.
Bright and creamy, these bars offer a refreshing escape from ordinary sweets.
Tropical flavors dance through each delectable bite, whisking you toward relaxation and joy.
Perfectly balanced between tart and sweet, this dessert feels like a mini vacation for your palate.
Smooth textures and zesty undertones create a memorable treat that sparks conversation and delights guests.
Baking enthusiasts and casual dessert lovers will adore how simple yet spectacular these bars can be.
Why Key Lime Pie Bars Always Deliver
Ingredient List For Key Lime Pie Bars
Base Ingredients:Filling Ingredients:Topping Ingredients:Essential Kitchen Tools for Key Lime Pie Bars
Steps for Making Key Lime Pie Bars

Prepare Oven and Pan
Crank the oven to 350°F. Grab that 8×8-inch pan and line it with parchment paper, making sure the paper climbs up the sides so pulling out the bars later will be super easy.
Create Graham Cracker Base
Mix the base ingredients carefully:
Stir everything until the mixture looks like damp sand that will hold together when pressed.
Press Crust into Pan
Firmly press the crumb mixture into the pan bottom, creating a smooth, even layer that covers every inch of the surface.
Bake Initial Crust
Slide the pan into the 350°F oven and bake exactly 10 minutes. Pull it out and let the crust cool down while getting the filling ready.
Whisk Egg Yolks
Separate those 4 egg yolks into a mixing bowl. Toss in 1 tablespoon lime zest and whisk until the mixture turns pale and slightly thickened.
Blend Condensed Milk
Pour the entire 14-ounce can of sweetened condensed milk into the egg mixture. Whisk thoroughly so everything combines perfectly.
Add Lime Filling Components
Stir in the remaining filling ingredients:
Whisk until the mixture looks completely smooth and silky.
Pour Filling
Carefully spread the lime filling over the cooled crust, making sure it covers the entire surface evenly.
Bake Filling
Return the pan to the 350°F oven and bake precisely 15 minutes. The filling should look set but still have a tiny wiggle in the center.
Cool at Room Temperature
Take the pan out and let the bars cool completely for about 1 hour on the kitchen counter.
Chill in Refrigerator
Transfer the pan to the refrigerator and let it firm up for at least 2 hours.
Cut and Remove Bars
Lift the entire dessert out using the parchment paper edges. Slice into clean, neat squares with a sharp knife.
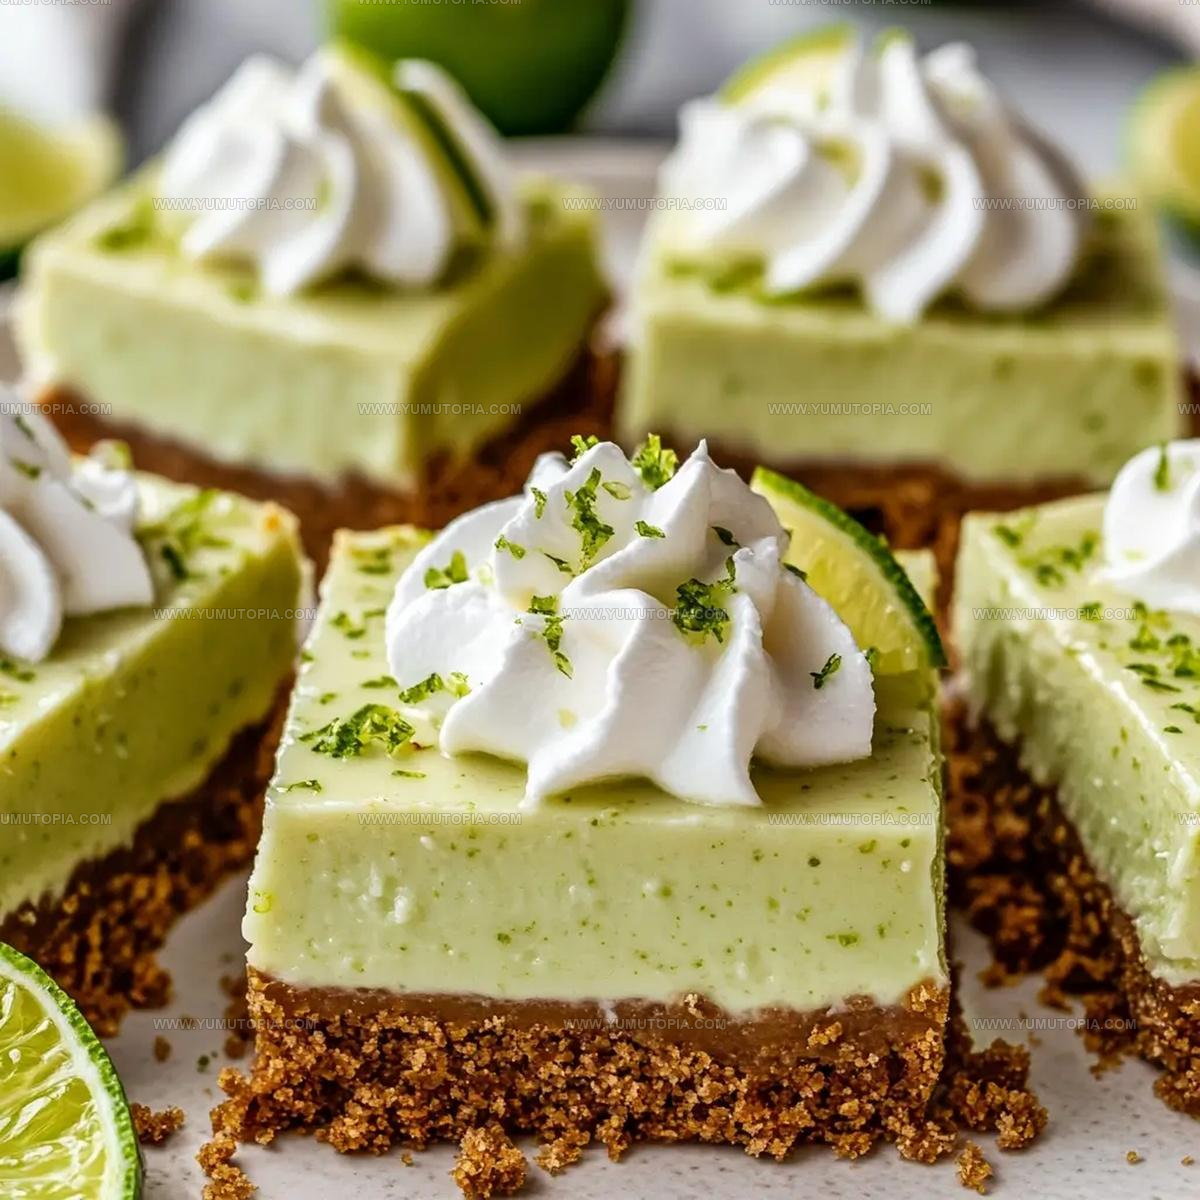
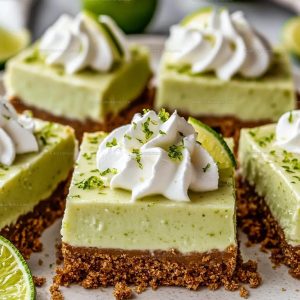
Garnish and Serve
Top each bar with a soft dollop of whipped cream and a sprinkle of fresh lime zest just before serving.
Smart Kitchen Notes For Key Lime Pie Bars
Flavor Twists for Key Lime Pie Bars
How To Slice Key Lime Pie Bars
Recommended Storage Method For Key Lime Pie Bars
Key Lime Pie Bars FAQ Overview
How tart will these bars taste?
The lime juice gives a bright, zesty flavor balanced by sweet condensed milk. The sour cream helps mellow the tartness, creating a smooth, tangy profile that’s not overwhelmingly sour.
Can fresh lime juice make a difference?
Absolutely! Fresh lime juice provides a more vibrant, authentic citrus taste compared to bottled juice. The zest adds extra flavor intensity that bottled juice cannot match.
What if graham crackers aren’t available?
Substitute with crushed digestive biscuits or vanilla wafer cookies. These alternatives work perfectly for creating a similar crisp, sweet crust base.
How do I know when the filling is perfectly baked?
Watch for a slight jiggle in the center while edges look set. The bars will continue firming up during cooling, so avoid over-baking.
Can these bars be made ahead of time?
Definitely! These bars keep wonderfully in the refrigerator for 3-4 days when covered tightly. The flavor actually develops and becomes more delicious overnight.
Are the bars very sweet?
The condensed milk provides sweetness, but the lime juice balances it nicely. Each bite offers a perfect harmony between sweet and tangy flavors.
Zesty Key Lime Pie Bars Recipe
- Total Time: 2 hours 35 minutes
- Yield: 9 1x
Description
Creamy key lime pie bars deliver a tangy tropical escape right from your kitchen counter, bringing zesty citrus sunshine to your dessert plate. These simple squares pack pure Florida flavor that dance across your taste buds with refreshing graham cracker crunch.
Ingredients
Base:
- 1½ cups graham cracker crumbs
- ⅓ cup granulated sugar
- 6 tablespoons unsalted butter
- 1 pinch salt
Filling:
- 1 14-ounce can sweetened condensed milk
- 4 large egg yolks
- ½ cup fresh lime juice
- ¼ cup sour cream
- 1 tablespoon lime zest
Topping:
- 1 serving whipped cream
- 1 serving lime zest
- 1 serving lime slices
Instructions
- Preheat your oven to 350°F. Grab an 8×8-inch pan and line it completely with parchment paper, ensuring sides are covered for easy removal.
- Combine 1½ cups graham cracker crumbs, ⅓ cup sugar, and a pinch of salt in a bowl. Pour 6 tablespoons melted butter over the mixture and blend until it resembles wet sand.
- Press the crumb mixture firmly into the bottom of the prepared pan, creating an even layer that covers the entire base.
- Slide the pan into the oven and bake the crust for exactly 10 minutes. Remove and let it cool slightly while preparing the filling.
- Separate 4 egg yolks into a mixing bowl. Add 1 tablespoon lime zest and whisk until the mixture looks slightly thickened and pale.
- Pour the entire 14-ounce can of sweetened condensed milk into the egg mixture. Whisk thoroughly until completely incorporated.
- Add ½ cup fresh lime juice and ¼ cup sour cream to the mixture. Whisk smoothly until the filling looks completely uniform and silky.
- Carefully pour the lime filling over the slightly cooled crust, ensuring an even distribution across the entire surface.
- Return the pan to the 350°F oven and bake for precisely 15 minutes. The filling should look just set but still have a slight jiggle in the center.
- Remove from the oven and let the bars cool completely at room temperature for about 1 hour.
- Transfer the pan to the refrigerator and chill for at least 2 hours to allow the bars to firm up completely.
- Use the parchment paper edges to lift the entire dessert from the pan. Slice into neat squares using a sharp knife.
- Optional: Garnish each bar with a dollop of whipped cream and a sprinkle of fresh lime zest before serving.
Notes
- Keep graham cracker crust firmly packed to ensure a solid base that won’t crumble when slicing bars.
- Use fresh lime juice for the brightest, most authentic flavor instead of bottled juice.
- Allow bars to chill completely for clean, neat cutting and the best texture – at least 2 hours in the refrigerator.
- For a gluten-free version, substitute graham cracker crumbs with almond flour or gluten-free cookie crumbs.
- Prep Time: 10 minutes
- Cook Time: 25 minutes
- Category: Dessert Bars
- Method: Baking
- Cuisine: American
Nutrition
- Serving Size: 9
- Calories: 289
- Sugar: 25 g
- Sodium: 84 mg
- Fat: 16 g
- Saturated Fat: 9 g
- Unsaturated Fat: 7 g
- Trans Fat: 0.1 g
- Carbohydrates: 30 g
- Fiber: 1 g
- Protein: 4 g
- Cholesterol: 110 mg
Madison Wyman
Recipe Developer & Food Storyteller
Expertise
Recipe Research and Adaptation, Food Writing and Cultural Storytelling, Sustainable and Ethical Sourcing, Dietary Adaptations (e.g., gluten-free, plant-based)
Education
Oregon Health & Science University
Portland Community College
Madison’s passion for flavor and culture ignited amidst the rich Southern cooking traditions of her upbringing, where cherished family recipes told delicious tales.
Armed with a Master’s in Food Systems and Society from Oregon Health & Science University and a Culinary Arts Certificate from Portland Community College, Madison truly excels at transforming rich, intricate flavors into dishes that are both approachable and heartfelt.
For her, cooking is a vibrant blend of science, art, and heritage – a powerful way to connect us to our roots and each other. Her recipes invite you to delve deeper, uncovering the fascinating stories woven into every ingredient.